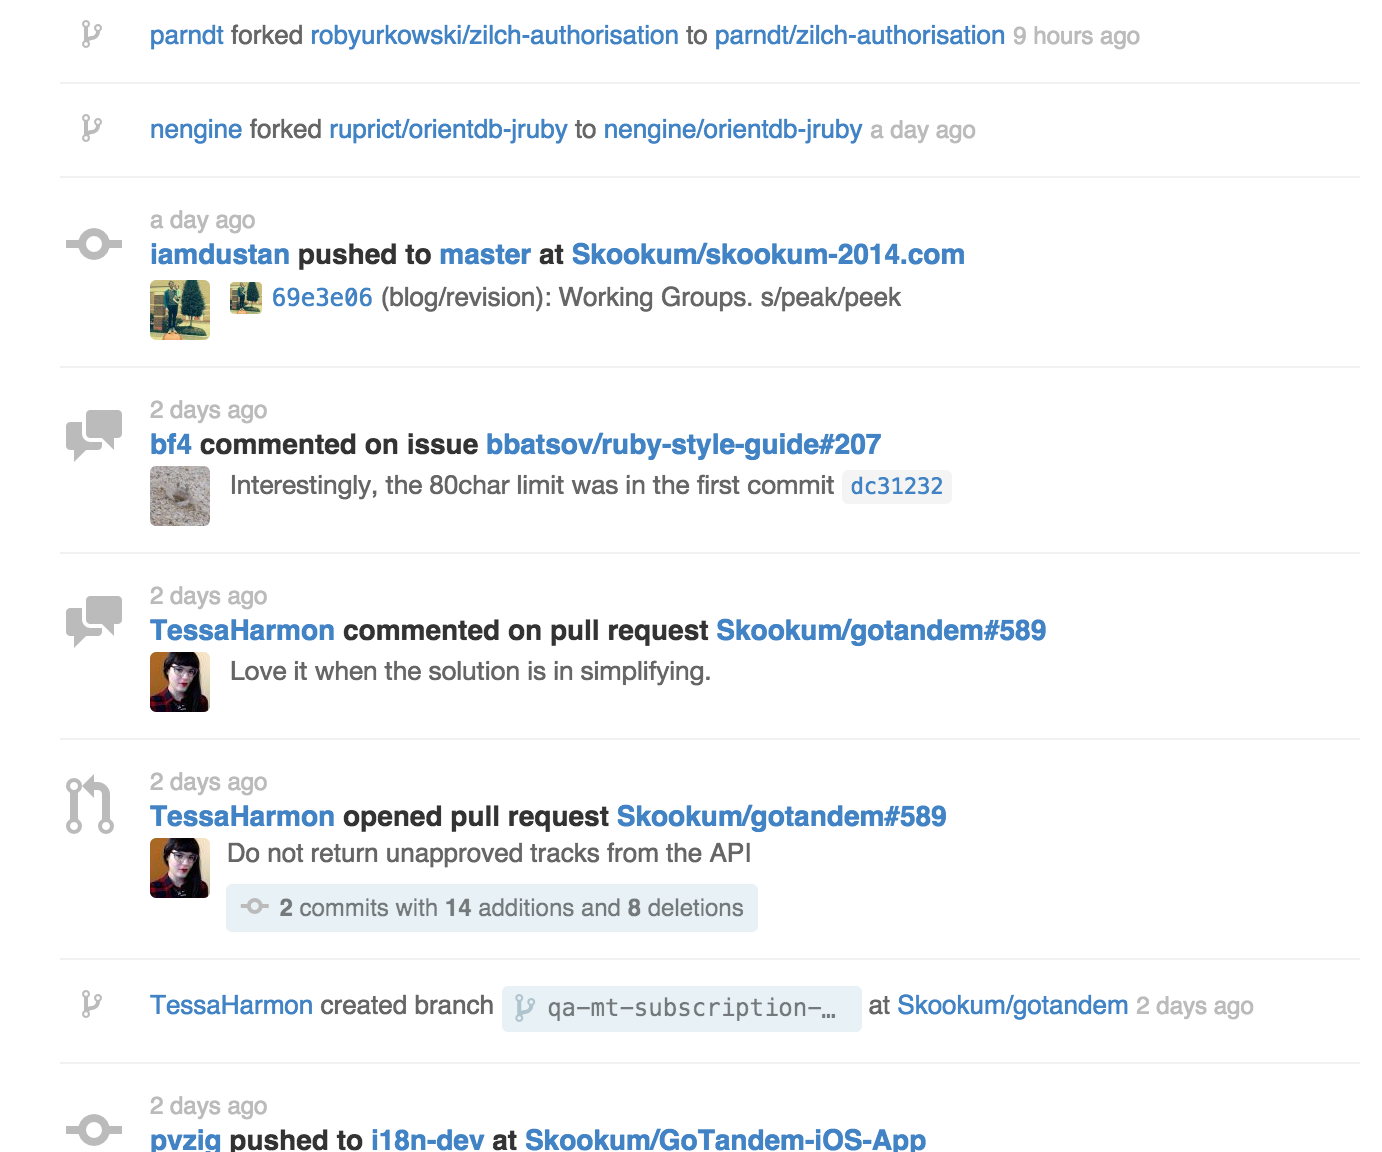
Activity feeds are all over the place. For example, Github’s main page lists all of the activity in your social coding network: one of your friends created or cloned a repo, a new issue was opened, your repo was forked or starred, etc.
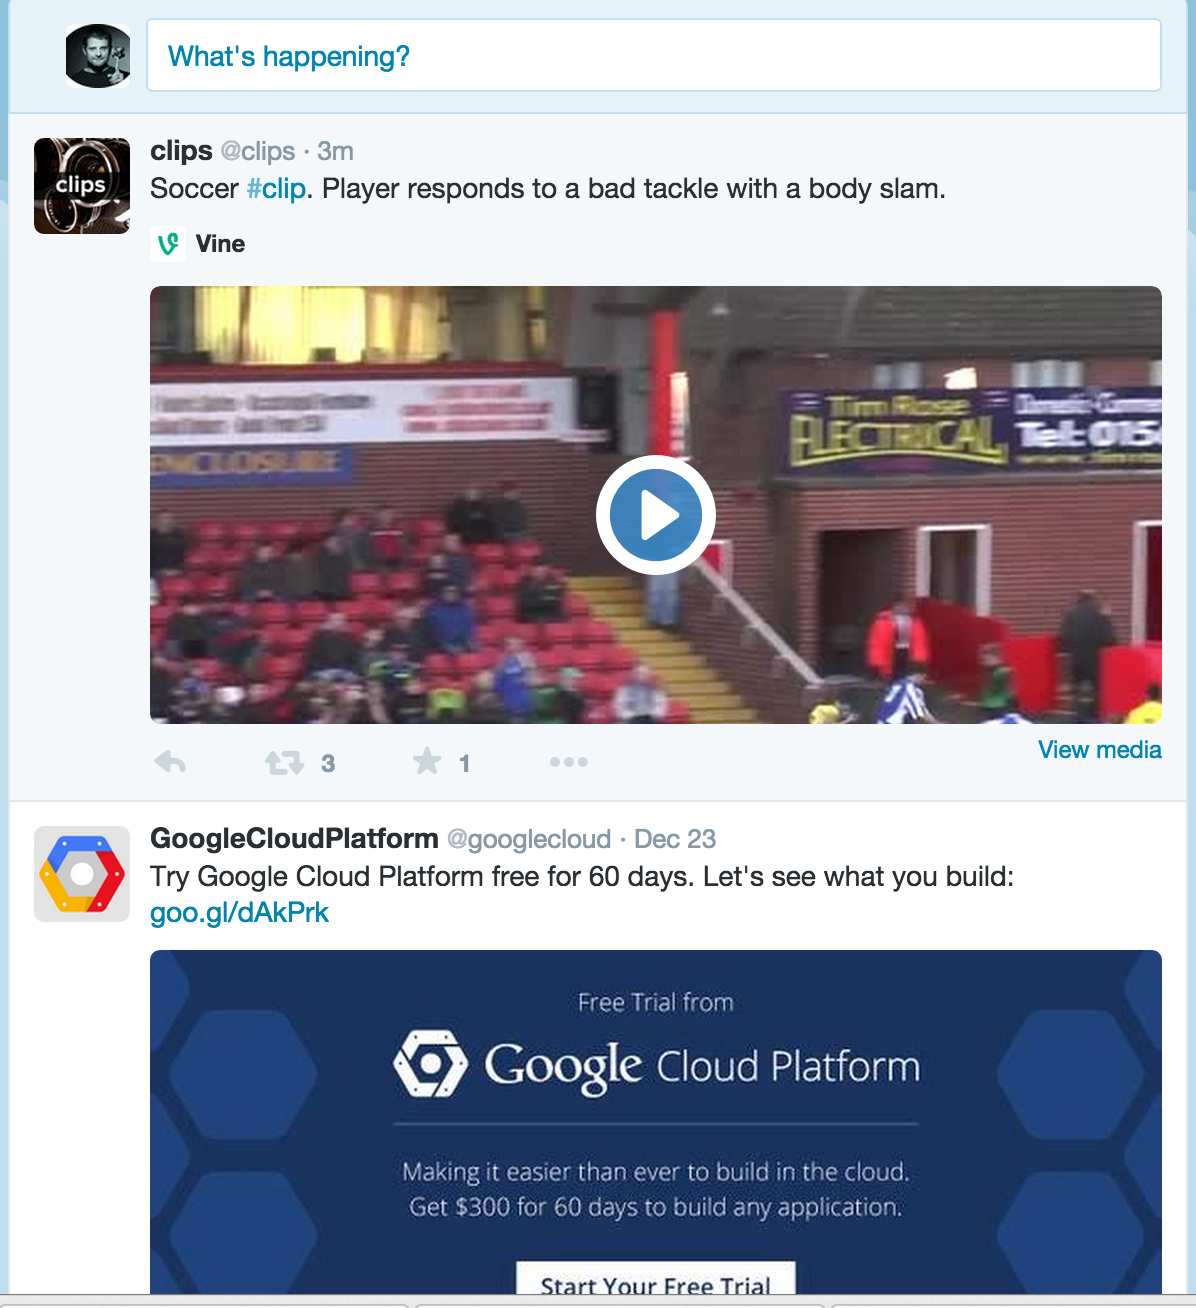
Twitter displays the latest tweets, retweets, and replies.
That’s a convenient and easy way for users to learn about recent updates. How about trying to replicate the same functionality with Rails? Turns out, there is a convenient gem that makes the development process very easy!
In this article, I am going to talk about public_activity, a gem created by Piotrek Okoński to easily track activity for models (and more, actually). I will show you how to easily create an activity feed and employ various features of public_activity to extend the app further.
Before proceeding, I wanted to make a small note. Some months ago, I wrote an article Versioning with PaperTrail that covered paper_trail, a gem used to implement version control of an application’s models. In some ways, paper_trail is similar to public_activity and could be used to implement a solution similar to the one presented in this article. However, paper_trail is aimed at crafting versioning systems, whereas public_activity was created specifically to implement activity feeds.
The working demo is available at sitepoint-public-activity.herokuapp.com.
The source code is available on GitHub.
Preparing the App
Suppose we want to create an app that will allow users to share (cool) stories. Users should be able to sign in, but guests will be allowed to post stories, as well. There will also be a “Like” button for each story. The most important piece of functionality, however, will be an activity feed, so users are able to see what has happened recently. Example activities in the feed are a story was added, deleted, or liked.
Time for the ground work. Let’s call our app Storyteller:
$ rails new Storyteller -TFor this demo I am using Rails 4.2.0, but the same solution (with only a few tweaks) can be implemented with Rails 3.
Drop in some gems that we are going to use:
Gemfile
[...]
gem 'bootstrap-sass', '~> 3.3.1'
gem 'autoprefixer-rails'
gem 'public_activity'
gem 'omniauth-facebook'
[...]
and run
$ bundle installbootstrap-sass and autoprefixer-rails are completely optional – the first one is used for styling and the second one automatically adds browser vendor prefixes to CSS rules. public_activity is the star today, as it will help us set up the activity feed. omniauth-facebook will be used to set up authentication.
If you’re following along, hook up Bootstrap’s styles:
application.scss
@import "bootstrap-sprockets";
@import "bootstrap";
@import 'bootstrap/theme';
Now, we have to prepare a couple of models. The first one will be called Story and contain the following attributes (I am skipping the default id, created_at and updated_at):
title(string) – title of the storybody(text) – body of the storyuser_id(integer) – foreign key to reference the author of the story
The second one will be called User and have these attributes:
name(string) – name (probably, with a surname) of the useruid(string) – user’s unique identifier provided by the social networkavatar_url(string) – user avatar’s URL
Create and apply the required migrations:
$ rails g model User name:string uid:string:index avatar_url:string
$ rails g model Story title:string body:text user:references
$ rake db:migrate
Tweak the model files like this:
user.rb
class User < ActiveRecord::Base
  has_many :stories
end
story.rb
class Story < ActiveRecord::Base
  belongs_to :user

  validates :title, presence: true
  validates :body, presence: true
end
Set up routes:
[...]
resources :stories

delete '/logout', to: 'sessions#destroy', as: :logout
get '/auth/:provider/callback', to: 'sessions#create'

root to: 'stories#index'
[...]
The /auth/:provider/callback is the callback route used by Facebook as a part of the OAuth2 sign in process. The :provider piece means that you may use any other Omniauth authentication strategy (or multiple strategies at once).
Focus on the layout now:
views/layouts/application.html.erb
[...]
<div class="navbar navbar-inverse">
  <div class="container">
    <div class="navbar-header">
      <%= link_to 'Storyteller', root_path, class: 'navbar-brand' %>
    </div>
    <ul class="nav navbar-nav pull-right">
      <% if current_user %>
        <li><span><%= image_tag current_user.avatar_url, alt: current_user.name %></span></li>
        <li><%= link_to 'Log Out', logout_path, method: :delete %></li>
      <% else %>
        <li><%= link_to 'Log In', '/auth/facebook' %></li>
      <% end %>
    </ul>
  </div>
</div>

<div class="container">
  <div class="page-header">
    <h1><%= yield :page_header %></h1>
  </div>

  <% flash.each do |key, value| %>
    <div class="alert alert-<%= key %>">
      <%= value %>
    </div>
  <% end %>

  <%= yield %>
</div>
[...]
Nothing special here apart from the yield :page_header piece of code that relies on a page_header helper method. Create it now:
application_helper.rb
module ApplicationHelper
  def page_header(header)
    content_for(:page_header) {header.to_s}
  end
end
Great, the next step is creating the controller to put this all together:
stories_controller.rb
class StoriesController < ApplicationController
  before_action :find_story, only: [:destroy, :show, :edit, :update]

  def index
    @stories = Story.order('created_at DESC')
  end

  def new
    @story = Story.new
  end

  def create
    @story = Story.new(story_params)
    if @story.save
      flash[:success] = 'Your story was added!'
      redirect_to root_path
    else
      render 'new'
    end
  end

  def edit
  end

  def update
    if @story.update_attributes(story_params)
      flash[:success] = 'The story was edited!'
      redirect_to root_path
    else
      render 'edit'
    end
  end

  def destroy
    if @story.destroy
      flash[:success] = 'The story was deleted!'
    else
      flash[:error] = 'Cannot delete this story...'
    end
    redirect_to root_path
  end

  def show
  end

  private

  def story_params
    params.require(:story).permit(:title, :body)
  end

  def find_story
    @story = Story.find(params[:id])
  end
end
This is a very basic controller, but it gets more interesting in a bit.
Now, the views:
views/stories/index.html.erb
<% page_header "Our cool stories" %>

<p><%= link_to 'Tell one!', new_story_path, class: 'btn btn-primary btn-large' %></p>

<% @stories.each do |story| %>
  <div class="well well-lg">
    <h2><%= link_to story.title, story_path(story) %></h2>

    <p><%= truncate(story.body, length: 350) %></p>

    <div class="btn-group">
      <%= link_to 'Edit', edit_story_path(story), class: 'btn btn-info' %>
      <%= link_to 'Delete', story_path(story), data: {confirm: 'Are you sure?'}, method: :delete, class: 'btn btn-danger' %>
    </div>
  </div>
<% end %>
As you can see, we are calling the page_header helper method that was defined a moment ago. Here’s what is displayed for each story:
views/stories/show.html.erb
<% page_header @story.title %>

<p><%= @story.title %></p>

<div class="btn-group">
  <%= link_to 'Edit', edit_story_path(@story), class: 'btn btn-info' %>
  <%= link_to 'Delete', story_path(@story), data: {confirm: 'Are you sure?'}, method: :delete, class: 'btn btn-danger' %>
</div>
The new and edit views are even simpler:
views/stories/new.html.erb
<% page_header "New cool story" %>

<%= render 'form' %>
views/stories/edit.html.erb
<% page_header "Edit cool story" %>

<%= render 'form' %>
A partial for the form to create a story:
views/stories/_form.html.erb
<%= form_for @story do |f| %>
  <%= render 'shared/errors', object: @story %>

  <div class="form-group">
    <%= f.label :title %>
    <%= f.text_field :title, class: 'form-control', required: true %>
  </div>

  <div class="form-group">
    <%= f.label :body %>
    <%= f.text_area :body, class: 'form-control', required: true, cols: 3 %>
  </div>

  <%= f.submit 'Post', class: 'btn btn-primary' %>
<% end %>
The shared/_errors partial is referenced here, so we have to create it too:
views/shared/_errors.html.erb
<% if object.errors.any? %>
  <div class="panel panel-danger">
    <div class="panel-heading">
      <h3 class="panel-title">The following errors were found while submitting the form:</h3>
    </div>

    <div class="panel-body">
      <ul>
        <% object.errors.full_messages.each do |msg| %>
          <li><%= msg %></li>
        <% end %>
      </ul>
    </div>
  </div>
<% end %>
And some basic styles:
application.scss
[...]
.well {
  h2 {
    margin-top: 0;
  }
}
[...]
That was the easy part. Before proceeding let’s also set up authentication via Facebook.
Authentication via Facebook
Create a new file omniauth.rb inside the config/initializers directory with the following content:
config/initializers/omniauth.rb
Rails.application.config.middleware.use OmniAuth::Builder do
  provider :facebook, ENV['FACEBOOK_KEY'], ENV['FACEBOOK_SECRET'], scope: 'public_profile'
end
To obtain the Facebook key and secret, visit the developers.facebook.com page and create a new application (with a type “Website”). On the Dashboard page of the newly created app, find the “App ID” and “App Secret” (a password will have to be provided to display this one) – this is what you need. Note: The key pair should not be available publicly – I am using environmental variables to store it.
While on Facebook Developers page, navigate to the Settings page and click the “Add Platform” button, then select “Website”. Next, fill in the following fields:
- Site URL (if you are testing the app on local machine, enter “http://localhost:3000”)
- App Domains (if you are on local machine, leave this blank)
- Contact Email
Click “Save Changes”.
Lastly, navigate to “Status & Review” and toggle the “Do you want to make this app and all its live features available to the general public?” to “Yes”. Your app is now live and users may log in using it.
The scope parameter specifies what actions to allow our application to perform. For this case, we only need to fetch basic information about the user that is logging in.
The next step is creating the controller that will handle log in and log out requests:
sessions_controller.rb
class SessionsController < ApplicationController
  def create
    user = User.from_omniauth(request.env['omniauth.auth'])
    session[:user_id] = user.id
    flash[:success] = "Welcome, #{user.name}"
    redirect_to root_url
  end

  def destroy
    session[:user_id] = nil
    flash[:success] = "Goodbye!"
    redirect_to root_url
  end
end
request.env['omniauth.auth'] contains all the information about the user. TheUser.from_omniauth class method needs to be created:
models/user.rb
class << self
  def from_omniauth(auth)
    user = User.find_or_initialize_by(uid: auth['uid'])
    user.name = auth['info']['name']
    user.avatar_url = auth['info']['image']
    user.save!
    user
  end
end
We are storing the necessary information and returning the user object as a result. The find_or_initialize_by method will either create a new user or update an existing one if the uid is already present in the database. This is done to prevent the same user being created multiple times.
And, lastly, the current_user method that will return the currently logged in user or nil:
controllers/application_controller.rb
[...]
private

def current_user
  @current_user ||= User.find_by(id: session[:user_id]) if session[:user_id]
end

helper_method :current_user
[...]
helper_method ensures that this method can be called from the views as well.
When you are done, boot up the server. Try to authenticate and add a couple of stories to check that everything is working. We are ready to move to the interesting part.
Integrating public_activity
public_activity‘s idea is quite simple: use callbacks to automatically store information about the changes that happen in the specified table. That information is then used to display all the recent activity. You might be wondering if it is possible to record activity without actually touching the table. Well, it is, and we will talk about it more in a bit.
For now, let’s do the basic setup. Run these commands:
$ rails g public_activity:migration
$ rake db:migrate
This will generate and apply public_activity‘s migration. A new table called activities is created.
To enable tracking for the Story model:
models/story.rb
[...]
include PublicActivity::Model
tracked
[...]
Pretty simple, isn’t it? Now, whenever you perform actions such as save, update_attributes, destroy, and others, public_activity‘s callback will be fired to record that event.
This gem also supports MongoMapper and Mongoid adapters – refer to the Database setup section in the docs to learn more.
Displaying the Activity Feed
Let’s display the events. You may either create a separate page to display the activity feed or render it on each page of your site. I’m going to stick with the latter option.
Tweak the controller:
stories_controller.rb
[...]
before_action :load_activities, only: [:index, :show, :new, :edit]

private

def load_activities
  @activities = PublicActivity::Activity.order('created_at DESC').limit(20)
end
[...]
As you can see, the Activity model is inside the PublicActivity namespace to prevent naming collisions. We are ordering activities by creation date (the newest the first) and taking the first twenty of them. Read more here.
Our layout needs to be changed a bit so that the activity feed is being placed on the right side of the website:
views/layouts/application.html.erb
[...]
<div class="col-sm-9">
  <%= yield %>
</div>

<%= render 'shared/activities' %>
[...]
views/shared/_activities.html.erb
<div class="col-sm-3">
  <ul class="list-group">
    <%= @activities.inspect %>
  </ul>
</div>
For those who don’t know, Bootstrap uses a 12-column grid layout, so by specifying col-sm-9 we are using 9 columns (75 % of the available space) for the main content. col-sm-3, in turn, leaves 3 columns for the activity feed. sm here means that columns will be displayed one beneath another (horizontal grid) on smaller displays. More information is available here.
Reload the page to check what the @activities array contains and how it displays. To render an array of activities there is a special helper method render_activities:
views/shared/_activities.html.erb
<div class="col-sm-3">
  <%= render_activities @activities %>
</div>
public_activity expects that there is a public_activity folder inside the views that, in turn, has a story folder (or any other folder with a singular name of the model that is related to the specific activity). Inside the story directory, there should be the following partials: _create.html.erb, _update.html.erb, _destroy.html.erb. Each partial, as you’ve probably guessed, is rendered for the corresponding action. Inside those partials there is a local variable activity (aliased as a) available.
Go ahead and create those files:
views/public_activity/story/_create.html.erb
<li class="list-group-item">
  <%= a.trackable.title %> was added.
</li>
views/public_activity/story/_update.html.erb
<li class="list-group-item">
  <%= a.trackable.title %> was edited.
</li>
views/public_activity/story/_destroyed.html.erb
<li class="list-group-item">
  <%= a.trackable.title %> was deleted.
</li>
The trackable is a polymorphic association which has all the necessary information about the model that was modified.
There is a problem, however. If you create and then delete a story, you’ll see an error undefined method 'title' for nil:NilClass. This is because the we are trying to fetch the title of the record that was deleted. It is easy enough to fix:
views/public_activity/story/_create.html.erb
<li class="list-group-item">
  <% if a.trackable %>
    <%= a.trackable.title %> was created.
  <% else %>
    An article that is currently deleted was added.
  <% end %>
</li>
views/public_activity/story/_update.html.erb
<li class="list-group-item">
  <% if a.trackable %>
    <%= a.trackable.title %> was edited.
  <% else %>
    An article that is currently deleted was edited.
  <% end %>
</li>
views/public_activity/story/_destroyed.html.erb
<li class="list-group-item">
  An article was deleted.
</li>
Pretty nice, but not very informative. When did the action take place? Can we navigate directly to the article that was modified? Who modified it? Well, the first two issues can be fixed easily:
views/public_activity/story/_create.html.erb
<li class="list-group-item">
  <span class="glyphicon glyphicon-plus"></span>
  <small class="text-muted"><%= a.created_at.strftime('%H:%M:%S %-d %B %Y') %></small><br/>
  <% if a.trackable %>
    <%= link_to a.trackable.title, story_path(a.trackable) %> was added.
  <% else %>
    An article that is currently deleted was added.
  <% end %>
</li>
views/public_activity/story/_update.html.erb
<li class="list-group-item">
  <span class="glyphicon glyphicon-edit"></span>
  <small class="text-muted"><%= a.created_at.strftime('%H:%M:%S %-d %B %Y') %></small><br/>
  <% if a.trackable %>
    <%= link_to a.trackable.title, story_path(a.trackable) %> was edited.
  <% else %>
    An article that is currently deleted was edited.
  <% end %>
</li>
views/public_activity/story/_destroyed.html.erb
<li class="list-group-item">
  <span class="glyphicon glyphicon-remove"></span>
  <small class="text-muted"><%= a.created_at.strftime('%H:%M:%S %-d %B %Y') %></small><br/>
  An article was deleted.
</li>
I’ve also added some Bootstrap Glyphicons so that everything looks a bit prettier.
Displaying information about the user responsible for the change involves a bit more work.
Storing Information About the User
There is a special field called owner in the activities table that is intended to store information about the user responsible for the action. The problem, however, is that the current_user method is not available inside the model so we have to use a pretty hacky solution.
Tweak the controller:
application_controller.rb
[...]
include PublicActivity::StoreController

def current_user
  @current_user ||= User.find_by(id: session[:user_id]) if session[:user_id]
end

helper_method :current_user
hide_action :current_user
[...]
Note that I’ve removed the private keyword because otherwise we won’t be able to call current_user from inside the model. Adding hide_action :current_user makes sure that this method is not considered a controller action.
Now the model:
models/story.rb
[...]
tracked owner: Proc.new { |controller, model| controller.current_user ? controller.current_user : nil }
[...]
The procedure takes two arguments: controller and model. In this case, we only need controller to call the current_user method; model stores the object that was modified.
With this in place, log in, add/change some stories and check the activities table. The owner field should be populated with user’s id.
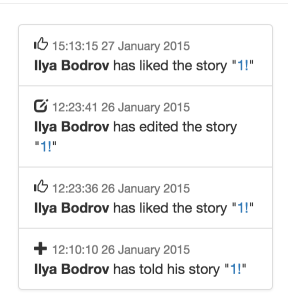
The last step is modifying the partials:
views/public_activity/story/_create.html.erb
<li class="list-group-item">
  <span class="glyphicon glyphicon-plus"></span>
  <small class="text-muted"><%= a.created_at.strftime('%H:%M:%S %-d %B %Y') %></small><br/>
  <strong><%= activity.owner ? activity.owner.name : 'Guest' %></strong>
  <% if a.trackable %>
    added the story <%= link_to a.trackable.title, story_path(a.trackable) %>.
  <% else %>
    added the story that is currently deleted.
  <% end %>
</li>
views/public_activity/story/_update.html.erb
<li class="list-group-item">
  <span class="glyphicon glyphicon-edit"></span>
  <small class="text-muted"><%= a.created_at.strftime('%H:%M:%S %-d %B %Y') %></small><br/>
  <strong><%= activity.owner ? activity.owner.name : 'Guest' %></strong>
  <% if a.trackable %>
    edited the story <%= link_to a.trackable.title, story_path(a.trackable) %>.
  <% else %>
    edited the story that is currently deleted.
  <% end %>
</li>
views/public_activity/story/_destroyed.html.erb
<li class="list-group-item">
  <span class="glyphicon glyphicon-remove"></span>
  <small class="text-muted"><%= a.created_at.strftime('%H:%M:%S %-d %B %Y') %></small><br/>
  <strong><%= activity.owner ? activity.owner.name : 'Guest' %></strong>
  deleted a story.
</li>
Now, for the newly performed actions you will see your name displayed; for the previous ones there should be a “Guest” string provided instead.
Everything is working fine, but our partials contain a lot of duplication – actually, the code is nearly identical. So let’s spend some time refactoring it.
Using I18n Fallbacks to Refactor Activity Partials
I want to completely get rid of those activity partials and work only with the shared/_activities.html.erb file. You should know, however, that there are some other possible solutions.
The basic structure of the partial will be as follows:
views/shared/_activities.html.erb
<div class="col-sm-3">
  <ul class="list-group">
    <% @activities.each do |activity| %>
      <li class="list-group-item">
        <!-- render activities here -->
      </li>
    <% end %>
  </ul>
</div>
It appears that only two things in the activity partials are different: the icon and the text saying what happened to the trackable object.
The issue with the icon can be easily fixed using regular expressions and some Sass magic:
views/shared/_activities.html.erb
<div class="col-sm-3">
  <ul class="list-group">
    <% @activities.each do |activity| %>
      <li class="list-group-item">
        <span class="glyphicon glyphicon-<%= activity.key.match(/\.(.*)/)[1] %>"></span>
      </li>
    <% end %>
  </ul>
</div>
The key fields contains the string in the form of story.create, story.update or story.destroy. Of course, Bootstrap applies no styles to classes like glyphicon-create but it can be easily changed:
application.scss
.glyphicon-update {
  @extend .glyphicon-edit;
}

.glyphicon-create {
  @extend .glyphicon-plus;
}

.glyphicon-destroy {
  @extend .glyphicon-remove;
}
We are employing Sass’ @extend directive to apply the styles to our new classes.
The issue with the text can be solved with the help of fallbacks. As we’ve already seen, public_activity by default will search for the partials inside the public_activity/display: :i18n option, I18n translations will be used instead.
The structure for those translation look like:
activity:
  model_name:
    create: '...'
    destroy: '...'
    update: '...'
    other_action: '...'
This way, we are also solving the possible internationalization problem that might arise in the future.
The partial contains the following code:
views/shared/_activities.html.erb
<div class="col-sm-3">
  <ul class="list-group">
    <% @activities.each do |activity| %>
      <li class="list-group-item">
        <span class="glyphicon glyphicon-<%= activity.key.match(/\.(.*)/)[1] %>"></span>
        <strong><%= activity.owner ? activity.owner.name : 'Guest' %></strong>
        <%= render_activity activity, display: :i18n %>
        <% if activity.trackable %>
          "<%= link_to activity.trackable.title, story_path(activity.trackable) %>"
        <% else %>
          with unknown title.
        <% end %>
      </li>
    <% end %>
  </ul>
</div>
Here the render_activity helper method is used – its alias render_activities we saw previously.
Now the translations file:
config/locales/en.yml
en:
  activity:
    story:
      create: 'has told his story'
      destroy: 'has removed the story'
      update: 'has edited the story'
The previously created public_activity folder may be removed completely.
This will only work, however, for a single trackable model. For multiple models you will have to create the corresponding partials. It is possible to create a separate layout (which actually is yet another partial) for your activities. Here is a demo app created by the author of public_activity that uses a layout to render activities.
Create Custom Activities
Until now, we only worked with the basic CRUD operations that caused activities to be saved automatically. But what if we wanted to track some custom events? Or if there is a need to trigger an activity without touching the model?
Not to worry, this can be done quite easily. Suppose we want to add the “Like” button and count likes for each post. Moreover, a special activity should be recorded, too.
First of all, we need to add a new column to the stories table:
$ rails g migration add_likes_to_stories likes:integer
$ rake db:migrate
Now the new route:
config/routes.rb
[...]
resources :stories do
  member do
    post :like
  end
end
[...]
Add the “Like” button to the view:
views/stories/show.html.erb
<% page_header @story.title %>

<p>
  <span class="label label-default"><%= pluralize(@story.likes, 'like') %></span>
  <%= link_to content_tag(:span, '', class: 'glyphicon glyphicon-thumbs-up') + ' Like it',
               like_story_path(@story), class: 'btn btn-default btn-sm', method: :post %>
</p>

[...]
And the controller action:
stories_controller.rb
before_action :find_story, only: [:destroy, :show, :edit, :update, :like]

[...]

def like
  @story.increment!(:likes)
  @story.create_activity :like
  flash[:success] = 'Thanks for sharing your opinion!'
  redirect_to story_path(@story)
end
[...]
@story.increment!(:likes) just adds 1 to the likes and saves the result to the database. @story.create_activity :like actually creates a new activity by providing the like key (we’ve talked about keys before when refactoring partials). This will require us to modify the translations file:
config/locales/en.yml:
en:
  activity:
    story:
      like: 'has liked the story'
      [...]
If you are dealing with partials instead, then you’ll have to create the views/public_activity/story/_like.html.erb partial.
The create_activity method is called to trigger a custom activity – it does not require a model change.
We are not done yet, however. There is one problem that will allow me to show one more feature of public_activity – disabling model tracking. You see, the @story.increment!(:likes) code fires an update which causes public_activity to record an update event. So, @story.create_activity :like will result in recording two activities for one action. This is obviously not what we want. The first operation should be done without any tracking at all.
public_activity allows disabling tracking globally or for a specific model. For global disabling, use
PublicActivity.enabled = falseTo disable tracking on model’s level use
Story.public_activity_offWe are going to employ the latter solution, as the first one is obviously overkill:
stories_controller.rb
def like
  Story.public_activity_off
  @story.increment!(:likes)
  Story.public_activity_on
  @story.create_activity :like
  flash[:success] = 'Thanks for sharing your opinion!'
  redirect_to story_path(@story)
end
This can be simplified further:
stories_controller.rb
def like
  without_tracking do
    @story.increment!(:likes)
  end
  @story.create_activity :like
  flash[:success] = 'Thanks for sharing your opinion!'
  redirect_to story_path(@story)
end

private

def without_tracking
  Story.public_activity_off
  yield if block_given?
  Story.public_activity_on
end
Now the increment operation will not cause the update activity to be triggered. Great!
Saving Custom Information
Suppose we want to store some additional information about the activity. How could we do this?
public_activity presents two ways to achieve the desired result. First of all, there is the serialized parameters field present in the activities table that we can access right away:
@story.create_activity :like, parameters: {why: 'because'}Later, we can access this information, like so:
activity.parameters['why']This is not always convenient, however. If you need some data to be saved for each activity, this approach requires calling create_activity for each action.
For other scenarios, there are custom fields available. Let’s, for example, store the title of the story so that we can fetch it even if the story is later deleted.
The setup is very simple. Create a new migration:
xxx_add_title_to_activities.rb
class AddTitleToActivities < ActiveRecord::Migration
  def change
    change_table :activities do |t|
      t.string :title
    end
  end
end
and apply it:
$ rake db:migrateAnd now tweak the model like this:
models/story.rb
[...]
tracked owner: Proc.new { |controller, model| controller.current_user ? controller.current_user : nil },
        title: Proc.new { |controller, model| model.title }
[...]
Let me remind you, that model stores the object that was changed.
And now we can display this title in case the model is destroyed:
shared/_activities.html.erb
<div class="col-sm-3">
  <ul class="list-group">
    <% @activities.each do |activity| %>
      <li class="list-group-item">
        <span class="glyphicon glyphicon-<%= activity.key.match(/\.(.*)/)[1] %>"></span>
        <small class="text-muted"><%= activity.created_at.strftime('%H:%M:%S %-d %B %Y') %></small><br/>
        <strong><%= activity.owner ? activity.owner.name : 'Guest' %></strong>
        <%= render_activity(activity, display: :i18n) %>
        <% if activity.trackable %>
          "<%= link_to activity.trackable.title, story_path(activity.trackable) %>"
        <% elsif activity.title %>
          <span class="text-muted">"<%= activity.title %>"</span>
        <% else %>
          with unknown title.
        <% end %>
      </li>
    <% end %>
  </ul>
</div>
Conclusion
I’ve shown you nearly all the features provided by public_activity – hopefully you will use it one of your future projects!
Have you ever implemented the similar activity feed? Which tools did you use? Share your experience! As always your feedback or article requests are very much welcome.
Happy hacking!
Frequently Asked Questions (FAQs) about Activity Feeds in Rails
How do I create an activity feed in Rails?
Creating an activity feed in Rails involves several steps. First, you need to generate a model for the activity feed. This model will store the activities that occur in your application. You can generate this model using the Rails generator command. After generating the model, you need to create a controller for the activity feed. The controller will handle the requests related to the activity feed. Finally, you need to create views for the activity feed. These views will display the activities to the users.
What are the best practices for implementing activity feeds in Rails?
There are several best practices for implementing activity feeds in Rails. One of the most important is to keep the activity feed model as simple as possible. This means that the model should only store the necessary information about the activities. Another best practice is to use background jobs for creating activities. This will ensure that the creation of activities does not slow down the response time of your application. Finally, it’s a good practice to paginate the activity feed. This will prevent the loading of too many activities at once, which can slow down your application.
How can I customize the appearance of my activity feed in Rails?
Customizing the appearance of your activity feed in Rails can be done by modifying the views of the activity feed. You can use HTML and CSS to style the activity feed according to your preferences. You can also use Rails helpers to simplify the creation of the views.
How can I filter activities in my activity feed in Rails?
Filtering activities in your activity feed in Rails can be done by adding conditions to the query that retrieves the activities from the database. You can add conditions based on the type of the activity, the user who performed the activity, or any other attribute of the activity.
How can I test my activity feed in Rails?
Testing your activity feed in Rails can be done using Rails’ built-in testing framework. You can write unit tests for the activity feed model, controller tests for the activity feed controller, and feature tests for the activity feed views. These tests will ensure that your activity feed works as expected.
How can I optimize the performance of my activity feed in Rails?
Optimizing the performance of your activity feed in Rails can be done by using eager loading for the activities, paginating the activity feed, and using background jobs for creating activities. Eager loading will reduce the number of queries to the database, pagination will prevent the loading of too many activities at once, and background jobs will ensure that the creation of activities does not slow down the response time of your application.
How can I add real-time updates to my activity feed in Rails?
Adding real-time updates to your activity feed in Rails can be done by using Action Cable, a part of Rails that provides WebSockets support. With Action Cable, you can broadcast new activities to the users as soon as they occur.
How can I handle errors in my activity feed in Rails?
Handling errors in your activity feed in Rails can be done by adding error handling code to the activity feed controller. This code will catch any exceptions that occur when creating, retrieving, or displaying activities, and it will display an appropriate error message to the user.
How can I secure my activity feed in Rails?
Securing your activity feed in Rails can be done by adding authentication and authorization checks to the activity feed controller. These checks will ensure that only authenticated users can access the activity feed, and that users can only see the activities that they are authorized to see.
How can I make my activity feed more interactive in Rails?
Making your activity feed more interactive in Rails can be done by adding features such as likes, comments, and shares to the activities. You can also add real-time updates to the activity feed, so that users can see new activities as soon as they occur.
 Ilya Bodrov-Krukowski
Ilya Bodrov is personal IT teacher, a senior engineer working at Campaigner LLC, author and teaching assistant at Sitepoint and lecturer at Moscow Aviations Institute. His primary programming languages are Ruby (with Rails) and JavaScript. He enjoys coding, teaching people and learning new things. Ilya also has some Cisco and Microsoft certificates and was working as a tutor in an educational center for a couple of years. In his free time he tweets, writes posts for his website, participates in OpenSource projects, goes in for sports and plays music.