Some time back, one of our writers submitted a Rails tutorial that mentioned RailsBricks as a starting point for the application. I had never heard of RailsBricks, so I checked it out and decided there could be other lost souls, such as myself.
RailsBricks is a gem that “enables you to create Rails apps much faster by automating mundane setup tasks and configuring useful common gems for you.” It also has a Lego brick as its logo. I love Legos. If RailsBricks is Legos for Rails, I am in like Flynn.
In a nutshell, RailsBricks leverages some of the most-used Rails gems into a handy little generator. Those features/gems are:
- Authentication with Devise
- UI with Bootstrap
- Automatically generated Email Initializers
- Application Secrets with Figaro
- Set up the database
- Easily create a Blog, product page, etc.
- Uses Redcarpet for Markdown
- Automatically create aContact form
- Set up Git repository
- Include gems for easy deployment to Heroku
As you can see, RailsBricks has lots of pieces. And, just like Legos, you can pick and choose which pieces you snap together to build your application. In essense, RailsBricks takes you far down the path to becoming a Master Builder.
Master Builder Blog
All this Lego talk is getting me in the mood to connect with other Master Builders. As such, I am going to create a blog where I discuss all my Lego learnings so my building wisdom can be spread throughout the land. Let’s start building.
Installation
RailsBricks is a gem, so gem install railsbricks and you’re off. The gem includes an executable called rbricks which, when typed by itself, yields:
> rbricks

RailsBricks usage:
------------------

rbricks --new (or -n) :
  --> create a new RailsBricks app.

rbricks --recreate-db (or -r) :
  --> drop, create, migrate & seed the DB

rbricks --config
  --> display your app config

rbricks --version (or -v) :
  --> display the RailsBricks version

More help, tutorials and documentation at
http://www.railsbricks.net/get-started
The Getting Started page mentions a note about Ruby versions, saying that the applications created with RailsBricks support the current point release (2.1.5) along with the previous one. I am using 2.1.5 for this demonstration.
Generate an Application
rbricks -n starts a set of questions that RailsBricks uses to build your app:
> rbricks -n

*****************************
*                           *
*     RailsBricks 3.0.2     *
*    www.railsbricks.net    *
*                           *
*     using Rails 4.1.7     *
*                           *
*****************************


- Do you want me to help you along the way by giving you tips?
1. Sure, help me make the right choices (default)
2. Nope, I already know how to use RailsBricks
Your choice (1-2):
I am choosing 1, since I am a RailsBrick first-timer. Notice, it’s using Rails 4.1.7 (the current 4.1 release is 4.1.8).
Foundation
1. Your Rails App Name
----------------------
First of all, you need to give a name to your new app. I'll create it in
/Users/ggoodrich/projects/rubysource/. Of course, only use a valid Rails app
name.

- What do you want to name your app?
(default: railsbricks_1214)
App name: master-builder-blog


2. Your Development Environment
-------------------------------
Before I can create your app, I need more information about your current
development environment. Note that I don't support versions of Ruby older than
2.0.0.

- Which version of Ruby do you want to use?
1. 2.0.0
2. 2.1.4
3. 2.1.5 (default)
Your choice (1-3): 3


On some systems, you can't install gems by issuing a simple 'gem install
name_of_gem' command but need to prefix it with 'sudo' and issue 'sudo gem
install name_of_gem'. If this is the case, you most likely will need to input
your password at some point.

- How do you usually install new gems?
1. gem install name_of_gem (default)
2. sudo gem install name_of_gem
Your choice (1-2): 1


Do you usually run rake tasks by prefixing them with 'bundle exec'? I also need
to know that.

- How do you usually run rake tasks?
1. rake some_task (default)
2. bundle exec rake some_task
Your choice (1-2): 1
The first two questions have you name your application and pick a Ruby version. In my case, thats mbblog and 2.1.5, respectively. After that, it’s questions about if you need sudo or bundle when you run commands in the terminal. I don’t.
Database
The database is the next brick in our app.
By default, Rails uses SQLite 3 to store the development database. I can change
that to PostgreSQL but you have to make sure that a PostgreSQL server is
installed and currently running. If it doesn't, the app creation will fail as I
won't be able to create the development database.

If you are on OS X, I struggle with the Postgres.app as the location of
pg_config keeps changing between versions. If you want to use PostgreSQL,
you'll have to use a full install which you can get through Homebrew by running
'brew install postgresql'.

- Which database engine do you want to use for development?
1. SQLite 3 (default)
2. PostgreSQL
Your choice (1-2): 2

Right, you decided to go with PostgreSQL. Note that I will only create a
development config. You'll have to manually edit
master_builder_blog/config/database.yml for test and production. I will create
the database so make sure it doesn't exist yet.

Right, you decided to go with PostgreSQL. Note that I will only create a
development config. You'll have to manually edit
master_builder_blog/config/database.yml for test and production. I will create
the database so make sure it doesn't exist yet.

- Your database server hostname?
example: 192.168.1.1, localhost, ...
(default: localhost)
Hostname: localhost


- What is the database port number?
(default: 5432)
Port: 5432

- What is the development database name?
(default master_builder_blog_development)
Database name:

- What is your database username?
(default: ggoodrich)
Database username: postgres

- What is your database user password?
tip: leave blank for none
(default: none)
Database user password:
RailsBricks defaults to SQLite3, but gives the option for PostgreSQL (PG). The wizard gives you a nice warning if you go the PostgreSQL route. PG must be installed and a server running, which is easy enough to do with Homebrew or on Ubuntu. I already have PG installed and running, so I chose that option.
Git

I can create a local and a remote Git repository for you. If you choose to do
so, I will also create a specific .gitignore file to make sure your secrets are
not distributed with your code.

- Create a local Git repository?
1. Yes (default)
2. No
Your choice (1-2): 1

- Add a remote Git repository?
1. Yes
2. No (default)
Your choice (1-2): 1

- What is the URL of your remote Git repository?
example: https://github.com/yourname/your_app.git
Remote URL: https://github.com/sitepoint-examples/railsbricks-tut.git
The wizard sets up git, which is easy enough. It also will create your remote if you have one, which is an added plus.
Authentication/Users

3. About Your App
-----------------
If your app will have users, I can create an authentication scheme using
Devise. If you want me to create resources accessible from an admin zone (blog
posts, for example), you will need to have an authentication scheme.

- Create an authentication scheme?
1. Yes (default)
2. No
Your choice (1-2): 1

You can choose what credentials users will need to provide to sign in. Whether
with a username and a password or with an email address and a password.

- How will users sign in?
1. With a username (default)
2. With an email address
Your choice (1-2): 1

If you don't want to allow new users to register, I can disable the sign up
feature.

- Allow new users to sign up?
1. Yes, they can click on a 'sign up' button (default)
2. No, I don't want to allow new users to sign up
Your choice (1-2): 1

I can also create 50 test users for you if you need.

- Create test users?
1. No, only create my Admin account (default)
2. Yes, create 50
Your choice (1-2):1
RailsBricks, as previously mentioned, will setup authentication with Devise. On top of that, you can choose how users login (email or username) and if they can register with your site. Also, your admin user will be created, if you wish. This is really nice, because many apps need these pieces to be considered real.
Post/Blog Resources
We’re creating a blog, so let’s have RailsBricks setup our Post resource:
I can create a Post model which is useful if you intend to have a blog, news,
articles, etc, in your app. The appropriate model, routes, controllers and
views will be created and useable in the admin zone. You will be able to add
new posts using the Markdown syntax. To change settings such as how many posts
are displayed on a page, refer to the RailsBricks documentation.

- Create Post resources?
1. Yes
2. No (default)
Your choice (1-2): 1
Contact Form
Our users will want to tell us how awesome MBBlog is, so we’ll need a contact form:
I can create a Contact form for you. Your visitors will be able to fill in
their name, email address and their message to you. Note that I won't allow
visitors to send you links in order to cut down on spam! To change the contact
form settings, refer to the RailsBricks documentation.

- Create a Contact form?
1. Yes
2. No (default)
Your choice (1-2): 1
Google Analytics

Analytics are important and will allow us to see who’s coming to the site. You need to head over to the Google Analytics site and sign up to get your Tracking ID.
I can already generate the necessary bits of code for using Google Analytics.
It will work with Turbolinks, don't worry. You will need to provide me with
your Google Analytics Tracking ID. It's a string like UA-000000-01. If you
don't have one yet, I will use UA-XXXXXX-XX and you can set it later within
master_builder_blog/app/views/layouts/_footer.html.erb.

- Use Google Analytics?
1. Yes (default)
2. No
Your choice (1-2): 1

- What is your Google Analytics tracking ID?
(default: UA-XXXXXX-XX)
Tracking ID: UA-56761773-1
Let’s send email to our users so they know when we have awesome new Master Builder content:
Your app can send emails. It is even required if you chose to add a contact
form or let new users sign up. Let's go through the basic settings I need to
know. If you choose not to configure your email settings now, you can do it at
a later stage by editing the relevant section within
master_builder_blog/config/application.yml.

- Configure email settings?
1. Yes (default)
2. No
Your choice (1-2): 1

- What is the email address you will send emails from?
example: someone@example.com
Email address: glenn.goodrich@mbblog.com

- What is your SMTP server address?
example: smtp.example.com
SMTP server: smtp.gmail.com

- What is the domain name of your SMTP server?
example: 192.168.1.1, example.com, ...
Domain name: mbblog.com

- What is the SMTP server port number?
(default: 587)
SMTP port:

- What is your SMTP username?
SMTP username: glenn.goodrich@mbblog.com

- What is your SMTP password?
tip: it will be stored in master_builder_blog/config/application.yml but won't
be tracked by Git
SMTP password: ******
This is really nice. RailsBricks takes care of setting all of the SMTP settings, including the passwords. Sensitive information will NOT be stored in Git, because that is bad.
UI/Bootstrap
RailsBricks includes Bootstrap setup, if you want it to. I do:
4. Your App UI
--------------
I will use Bootstrap 3 to build the UI of your app. You can change Boostrap
default values by editing
master_builder_blog/app/assets/railsbricks_custom.css.scss.

- Which UI scheme do you want to use for the content area?
1. Light (default)
2. Dark
Your choice (1-2): 2

- Which UI scheme do you want to use for the navbar?
1. Light
2. Dark (default)
Your choice (1-2): 2

- Which UI scheme do you want to use for the footer?
1. Light
2. Dark (default)
Your choice (1-2):

The primary color is expressed as a hexadecimal value such as #663399 (purple).
In master_builder_blog/app/assets/railsbricks_custom.css.scss, the primary
color is assigned to a variable named '$brand-primary'. It is used as the base
color for links, default buttons, etc... .

- What primary color do you want to use?
tip: expressed as hexadecimal such as #663399
(default: #428BCA)
Primary color:

Fonts are an important part of you app. You can see what each proposed font
looks like by searching for their names on Google Fonts.

- Which font family and fallback options do you want to use as the main one for
the UI?
1. Open Sans, Helvetica, Arial, sans-serif (default)
2. Arial, Helvetica, sans-serif
3. GENTIUM BASIC, TIMES NEW ROMAN, SERIF
4. ANONYMOUS PRO, COURIER NEW, MONOSPACE
YOUR CHOICE (1-4): 4
RailsBricks configures one of two themes (Light or Dark) and fonts.
Production Settings

MBBlog will be hosted on Heroku. You know what? RailsBricks can help us set that up, too:
5. Your Production Settings
---------------------------
At some point, you will deploy your app to a production environment. I can
already set up some settings for you.

    - Do you want to set up some production settings already?
    1. Yes (default)
    2. No
    Your choice (1-2): 1

    If you opt to host your app with Heroku, I can already add the necessary 12
    Factor gem to a production group within your Gemfile.

    - Where will you host your app?
    1. Heroku (default)
    2. Somewhere else
    Your choice (1-2): 1

    - What will be the URL of your app?
    example: www.my-app.com, blog.my-app.com, ...
    tip: don't prefix the URL with http://
    URL: mbblog.net

    By default, Rails apps use WEBrick as a simple HTTP web server. Although it is
    a good web server for development purpose, it is not really advised to use it
    in a production environment. I can configure your app to use Unicorn in
    production. If you choose so, I will add the Unicorn gem to your Gemfile within
    the :production group, create a unicorn.rb file within
    master_builder_blog/config and add a Procfile to your app root. You can edit
    Unicorn settings in master_builder_blog/config/unicorn.rb if you need to.

    - Do you want to use Unicorn in production?
    1. Yes (default)
    2. No
    Your choice (1-2): 1
It’s worth noting that RailsBricks does not run heroku create, so you’ll have to do that manually. However, RailsBricks adds the rails12factor gem to the Gemfile and configures Unicorn, allowing our app to have a solid, multi-process server in production.
OK, Go!
The last thing the wizard asks is if we want to setup the application right now. Why wouldn’t we?
6. Summary
----------

- I am ready! Generate master_builder_blog now?
1. Do it! (default)
2. No, not now
Your choice (1-2): 1
By the way, if you chose ‘No’ here, it aborts the creation and you have to start anew.
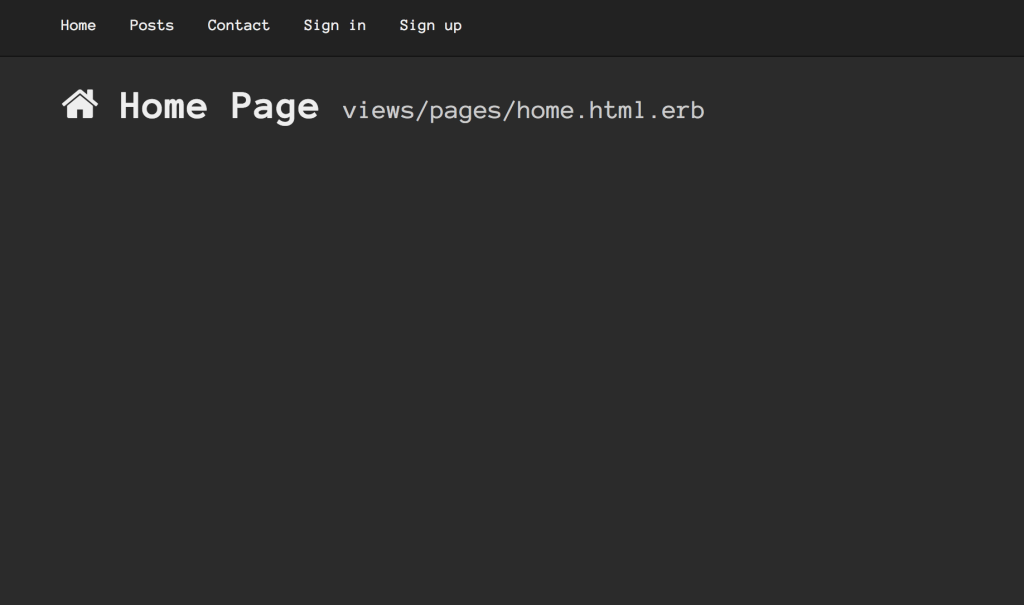
The Final Application
After all that, what hath our contstruction choices wrought? Firing up a Rails server (rails s) and opening http://localhost:3000 brings up the following page:
Clicking on “Sign In” takes us to a login page. Remember, RailsBricks made an admin user for us, so login with admin/admin. Note: I had to fire up a Rails console and change the admin password to get logged in.
Once logged in, an “Admin” menu appears in the top menu bar.
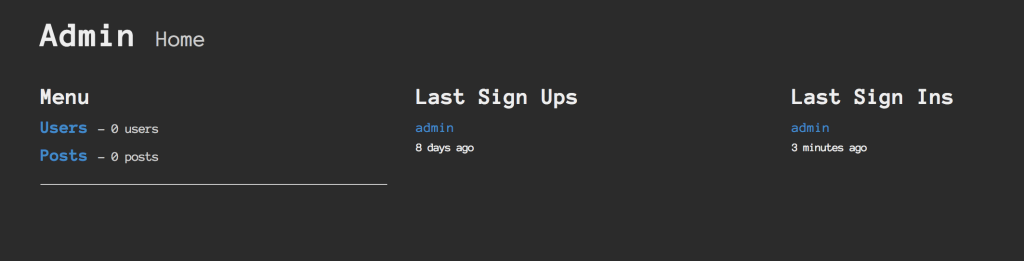
It shows the most recent sign-ins and sign-ups, along with the number of users and posts. Let’s create a post. Click on “Posts”, then “New post”
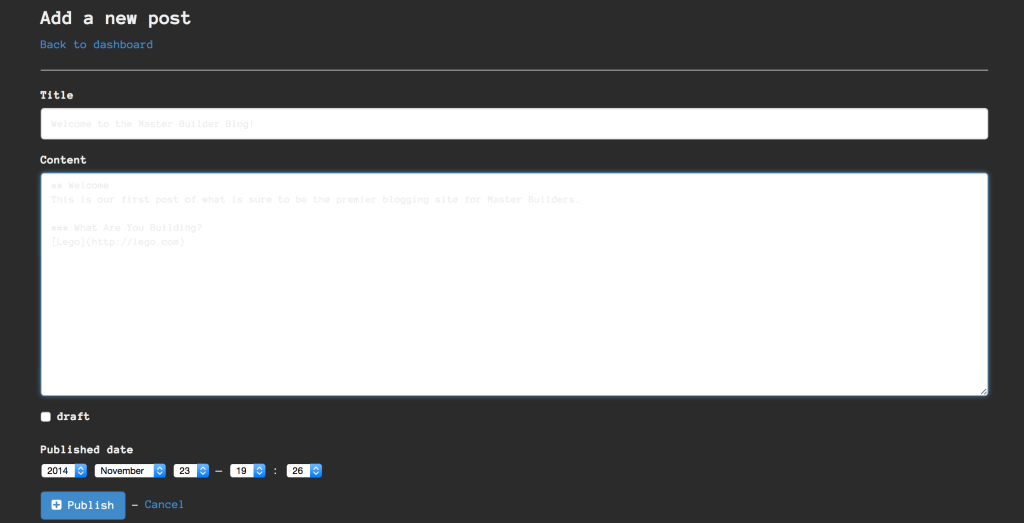
The new post form is pretty standard. It does, however, allow you to use Markdown, which is very cool. In my application, the font in the text widgets is super light, so I feel like my UI choices might have been a bit off. Regardless, this is pretty cool. I can mark the post as a draft or publish it straight away.
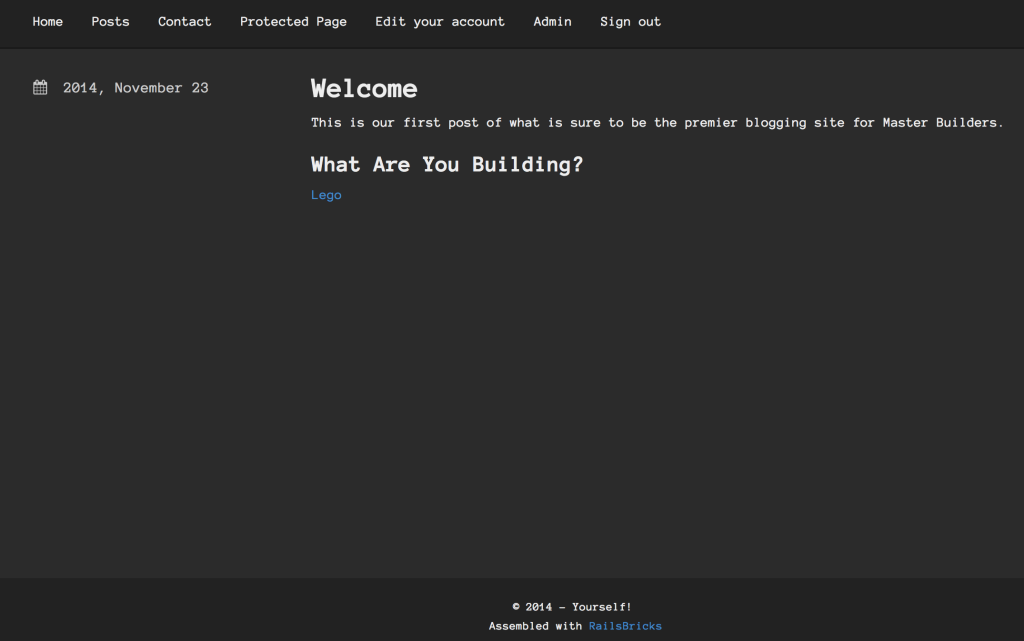
Now, the Posts page lists my post, having transformed the markdown into HTML. Excellent.
Get Building
I’ll have to say my foray into RailsBricks was about as enjoyable as playing with Legos. I can choose what to build from a selection of solid tools with smart defaults. All in all, RailsBricks is a great choice if you want a Rails application with authentication, blog resources, configured production settings, and more.
By the way, the source for my RailsBrick-generated app can be found on Github.
Get building!
 Glenn Goodrich
Glenn works for Skookum Digital Works by day and manages the SitePoint Ruby channel at night. He likes to pretend he has a secret identity, but can't come up with a good superhero name. He's settling for "Roob", for now.