Have you ever wondered how many ways there are to build a Ruby on Rails application with VueJS?
This is the first of three articles which explain step by step how you can build a Rails application with VueJS with some advice on which technique you should use based on your needs.
Why JSX?
JSX is an extension of JavaScript.
It can be used with VueJS to build components avoiding to use .vue templates.
With this approach, we can build a large and scalable frontend easily.
JSX syntax is recommended to integrate VueJS to an existing complex project or to start a project which needs a bold framework like Solidus.
Here are some of the advantages of using JSX:
- The backend and frontend are in the same codebase
- We can use the Rails routes (It isn't a SPA)
- We can share context between application sections (e.g., product page, sliding cart)
- We can create many Vue instances for each section
- We don't necessarily have to build the APIs
And some of the disadvantages:
- We can't use
.vuetemplates - With JSX Babel preset we can't use some Vue directives like
v-for,v-if, etc.
TL;DR;
You can find the code in this GitHub repository.
Branches:
master: Rails products catalog application without Webpack and VueJSvuejs-jsx: integration of Webpack and VueJS on the Ruby on Rails application
Let's start
We'll start from an existing Rails application and will move it step by step to VueJS.
Clone the repository and bootstrap the project:
$ git clone https://github.com/nebulab/rails-vuejs-jsx.git
$ cd rails-vuejs-jsx
$ asdf local ruby 2.5.1 # If you use asdf as version manager
$ ./bin/setup
$ bundle exec rails s
Project overview
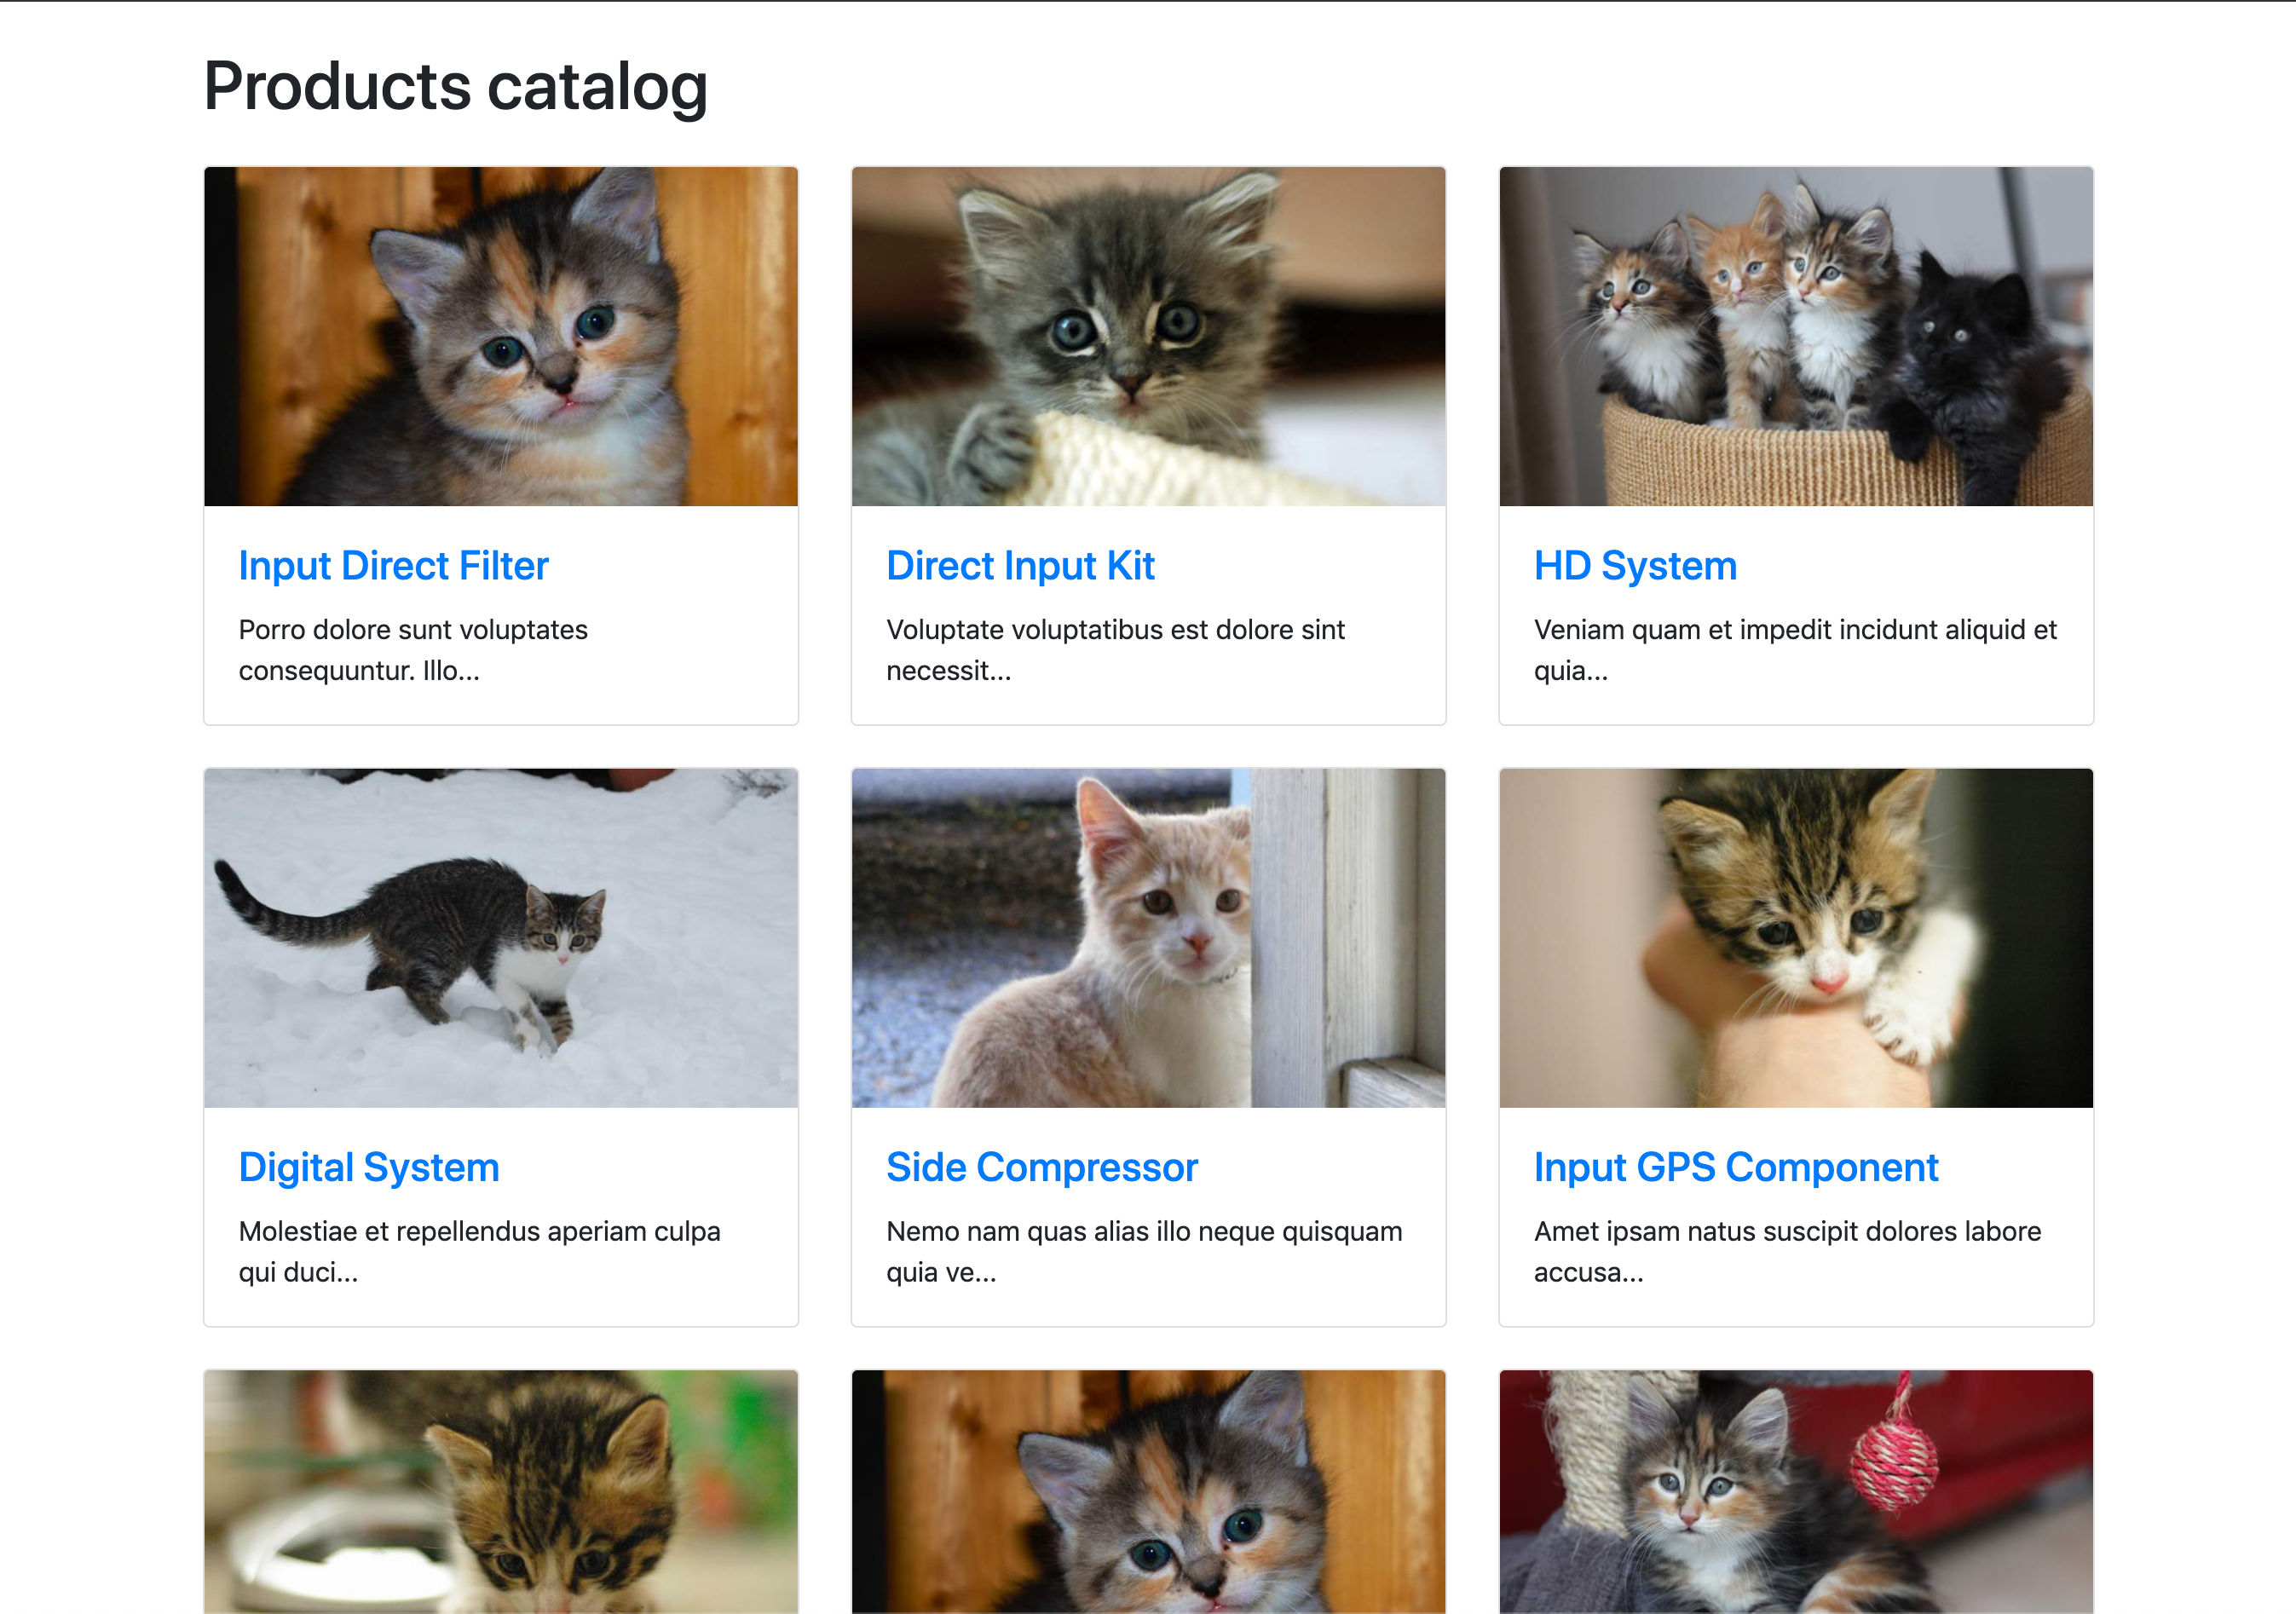
The application is a products catalog.
The root path shows the list of the products and clicking on one of them reveals the product details. For each product you can read, add or delete the related comments.
Our goal is to move some parts of this app into VueJS components.
Start with the Vuetification
To run VueJS code in the Rails application, we need to install Webpack which is a static module bundler.
A Rails application is usually built with Sprockets to compile and serve web assets. Both libraries can live together.
Install Webpack using webpacker gem
- Add the webpacker gem into your Gemfile and install it
gem 'webpacker', '~> 4.x'
$ bundle install
$ bundle exec rails webpacker:install
The installation command generates all the files needed to configure Webpack on Rails.
To manage all the JS dependencies we use yarn.
Install Node using your favorite version manager, I usually use asdf
$ asdf install nodejs 10.16.0
$ asdf local nodejs 10.16.0
and install yarn
$ npm i -g [email protected]
To check if the project is now working with Webpack, restart the Rails server
and the webpack-dev-server
$ yarn install
$ bundle exec rails server
$ ./bin/webpack-dev-server
- Now add the pack link in your
application.html.erbfile
<head>
		<title>RailsVuejsJsx</title>
		<%= csrf_meta_tags %>
		<%= csp_meta_tag %>
		<%= stylesheet_link_tag    'application', media: 'all', 'data-turbolinks-track': 'reload' %>
		<%= javascript_include_tag 'application', 'data-turbolinks-track': 'reload' %>
		<%= javascript_pack_tag 'application', 'data-turbolinks-track': 'reload' %>
</head>
- If everything is set in the correct way, you should see the Webpacker message in the browser console

Install VueJS
- Install VueJS using the Webpacker command:
$ bundle exec rails webpacker:install:vue
- Remove useless files like:
hello_vue.jsandapp.vue - If your project uses Turbolinks, install the
vue-turbolinkslibrary
$ yarn add vue-turbolinks
- Edit the
application.jsfile, pay attention here: we MUST change theapplication.jsin thejavascript/packsdirectory of theapp
/* eslint no-console:0 */
import TurbolinksAdapter from 'vue-turbolinks'
import Vue from 'vue'
// Import all the macro components of the application
import * as instances from '../instances'
Vue.use(TurbolinksAdapter)
document.addEventListener('turbolinks:load', () => {
		// Initialize available instances
		Object.keys(instances).forEach((instanceName) => {
				const instance = instances[instanceName]
				const elements = document.querySelectorAll(instance.el)
				elements.forEach((element) => {
					const props = JSON.parse(element.getAttribute('data-props'))
					new Vue({
						el: element,
						render: h => h(instance.component, { props })
					})
				})
		})
})
- Create the
instances.jsfile which contains all the Vue instances, the application macro-areas that you want to migrate to Vue
app/javascript/instances.js
// Import components
import ProductList from './components/product/index'
export const ProductListInstance = {
		el: '.vue-products',
		component: ProductList
}
- Add your first Vue component
app/javascript/components/product/index.jsthat shows the product list
export default {
		name: 'ProductList',
		render() {
				return(
					<h1>Products catalog</h1>
				)
		}
}
- Replace the content of
app/views/products/index.html.erb:
<div class="vue-products">
</div>
If you restart the Rails and Webpack server, you should see an error:

The problem is that Babel doesn't have the correct preset to understand the JSX syntax with VueJS. To solve the issue, we must add the preset and configure Babel to use it.
$ yarn add @vue/babel-preset-jsx @vue/babel-helper-vue-jsx-merge-props
Open the Babel configuration file babel.config.js and add the preset to the presets array.
At the end it should look like this:
presets: [
		isTestEnv && [
				require('@babel/preset-env').default,
				{
					targets: {
						node: 'current'
					}
				}
		],
			(isProductionEnv || isDevelopmentEnv) && [
				require('@babel/preset-env').default,
				{
					forceAllTransforms: true,
					useBuiltIns: 'entry',
					corejs: 3,
					modules: false,
					exclude: ['transform-typeof-symbol']
				}
		],
		'@vue/babel-preset-jsx'
].filter(Boolean)
If you restart the Webpack server and reload the page, you should see your first component.

Move the product list to VueJS
The fastest way to do this should be to copy the html.erb template in the
component file and replace the ERB code with JSX.
In this example, I copied the content of app/views/products/index.html.erb to app/javascript/components/product/index.js and deleted the Rails code.
When you build a VueJS application, it's very important to create a component for every piece of code that has a different context.
For example: product/index.js will show the list of products but each product should be a separated component called product/card.js.
Here are the results:
app/javascript/components/product/index.js
import ProductCard from './card'
export default {
		name: 'ProductList',
		props: {
		products: Array
		},
		render() {
				return(
					<div>
						<h1 class="my-4">
							Products catalog
						</h1>
						<div class="row">
							{this.products.map(product => (
								<ProductCard product={product} />
							))}
						</div>
					</div>
				)
		}
}
app/javascript/components/product/card.js
export default {
		name: 'ProductCard',
		props: {
				product: Object
		},
		methods: {
				shortDescription() {
					let description = this.product.description
					if (description.length > 50) {
						return `${description.substr(0, 50)}...`
					} else {
						return description
					}
				}
		},
		render() {
				return(
					<div class="col-lg-4 col-sm-6 mb-4">
						<div class="card h-100">
							<a href={this.product.url}>
								<img src={this.product.image} class="card-img-top" alt="" />
							</a>
							<div class="card-body">
								<h4 class="card-title">
									<a href={this.product.url}>
										{ this.product.name }
									</a>
								</h4>
								<p class="card-text">
									{ this.shortDescription() }
								</p>
							</div>
						</div>
					</div>
				)
		}
}
-
The product list component has to render the products which should be passed using
props.propsis a JS object which contains the params passed by the parent component. In this example, you have to pass the products to the ProductCard component when you render it. -
app/views/products/index.html.erb
<% props = { products: serialize('serializers/products', products: @products) }.to_json %>
<div class="vue-products" data-props="<%= props %>"></div>
- The
serializemethod is a helper method which you must add toapp/helpers/application_helper.rb
module ApplicationHelper
		def serialize(template, options = {})
				JbuilderTemplate
					.new(self) { |json| json.partial! template, options }.attributes!
		end
end
- Product list serializer:
app/views/serializers/_products.jbuilder
json.array! products do |product|
		json.partial! 'serializers/product', product: product
end
- Product detail serializer:
app/views/serializers/_product.jbuilder
json.id product.id
json.name product.name
json.description product.description
json.image url_for(product.image)
json.url product_path(product)
Now the product list page should work showing the list of the products using VueJS.

      strict: process.env.NODE_ENV !== 'production'
    })
```
- Create the
app/javascript/store/modules/index.jsfile which includes all the store modules
import product from './product'
export default {
		product
}
- Create the modules. In this case, the store should store only the product comments
app/javascript/store/modules/product.js
const defaultState = {
		comments: []
}
export const actions = {
		fillComments({ commit }, comments) {
				commit('fillComments', comments)
		}
}
export const mutations = {
		fillComments(state, comments) {
				state.comments = comments
		}
}
export default {
		state: defaultState,
		actions,
		mutations
}
- Add the store instance to the VueJS instances in the
app/javascript/packs/application.jsfile like this
...
...
// Import the store
import store from '../store'
...
...
...
		new Vue({
				el: element,
				store,
				render: h => h(instance.component, { props })
		})
Install and configure i18n-js gem
This is used to share translations between Rails and Javascript.
- Add the
i18n-jsgem to the Gemfile - Run
bundle install - Add the
//= require i18n/translationsinto theapp/assets/javascripts/application.jsfile - Restart the server
Move the comments list to VueJS
As initially said, we can move the whole application to VueJS or only some of its sections. In this case, we are moving the product list, the comments list and the comment form.
- Add the comments list component to
app/javascript/instances.js
// Import components
import ProductList from './components/product/index'
import CommentList from './components/comment/index'
export const ProductListInstance = {
		el: '.vue-products',
		component: ProductList
}
export const CommentListInstance = {
		el: '.vue-comments',
		component: CommentList
}
- Comments list component:
app/javascript/components/comment/index.js
import { mapState, mapActions } from 'vuex'
import CommentCard from './card'
export default {
		name: 'CommentList',
		props: {
				product: Object
		},
		computed: {
				...mapState({
					comments: state => state.product.comments
				})
		},
		methods: {
				...mapActions({
					fillComments: 'fillComments'
				}),
				thereAreComments() {
					return this.comments.length > 0
				}
		},
		mounted() {
				this.fillComments(this.product.comments)
		},
		render() {
				return(
					<div>
						<h4 class="my-4">Comments</h4>
						<div class="row">
							{this.thereAreComments() &&
								this.comments.map(comment => (
									<CommentCard comment={comment} />
								))
							}
							{!this.thereAreComments() &&
								<div class="col-md-12">
									<p>
										{ I18n.t('comments.empty') }
									</p>
								</div>
							}
						</div>
					</div>
				)
		}
}
- Comment card component:
app/javascript/components/comment/card.js
import { mapActions } from 'vuex'
export default {
		name: 'CommentCard',
		props: {
				comment: Object
		},
		methods: {
				...mapActions({
					cancelComment: 'cancelComment'
				})
		},
		render() {
				return(
					<div class="col-md-12 my-2">
						<div class="card">
							<div class="card-body">
								<h5 class="card-title">{ this.comment.title }</h5>
								<p class="card-text">{ this.comment.description }</p>
								<button class="btn btn-sm btn-danger" onClick={event => this.cancelComment(this.comment.id)}>
									{ I18n.t('comments.form.delete') }
								</button>
							</div>
						</div>
					</div>
				)
		}
}
- Remove the comments partial:
app/views/shared/_comments.html.erb - Replace the content of
app/views/products/show.html.erbwith this:
<h1 class="my-4">
		<%= @product.name %>
</h1>
<p>
		<%= link_to t('products.back'), products_path %>
</p>
<div class="row">
		<div class="col-md-8">
				<%= image_tag @product.image, class: 'img-fluid' %>
		</div>
		<div class="col-md-4">
				<h3 class="my-3">Project Description</h3>
				<p>
					<%= @product.description %>
				</p>
		</div>
</div>
<%
		props = {
				product: serialize('serializers/product', product: @product)
		}.to_json
%>
<div class="vue-comments" data-props="<%= props %>"></div>
- Add the comment serializer at the end of
app/views/serializers/_product.jbuilder:
json.comments product.comments do |comment|
		json.partial! 'serializers/comment', comment: comment
end
- Create the comment serializer
app/views/serializers/_comment.jbuilder:
json.id comment.id
json.title comment.title
json.description comment.description
- Create a couple of comments using the console:
$ bundle exec rails console
product = Product.first
Comment.create!(title: 'This is the first comment', description: 'Comment description', product: product)
Comment.create!(title: 'This is the second comment', description: 'Comment description', product: product)
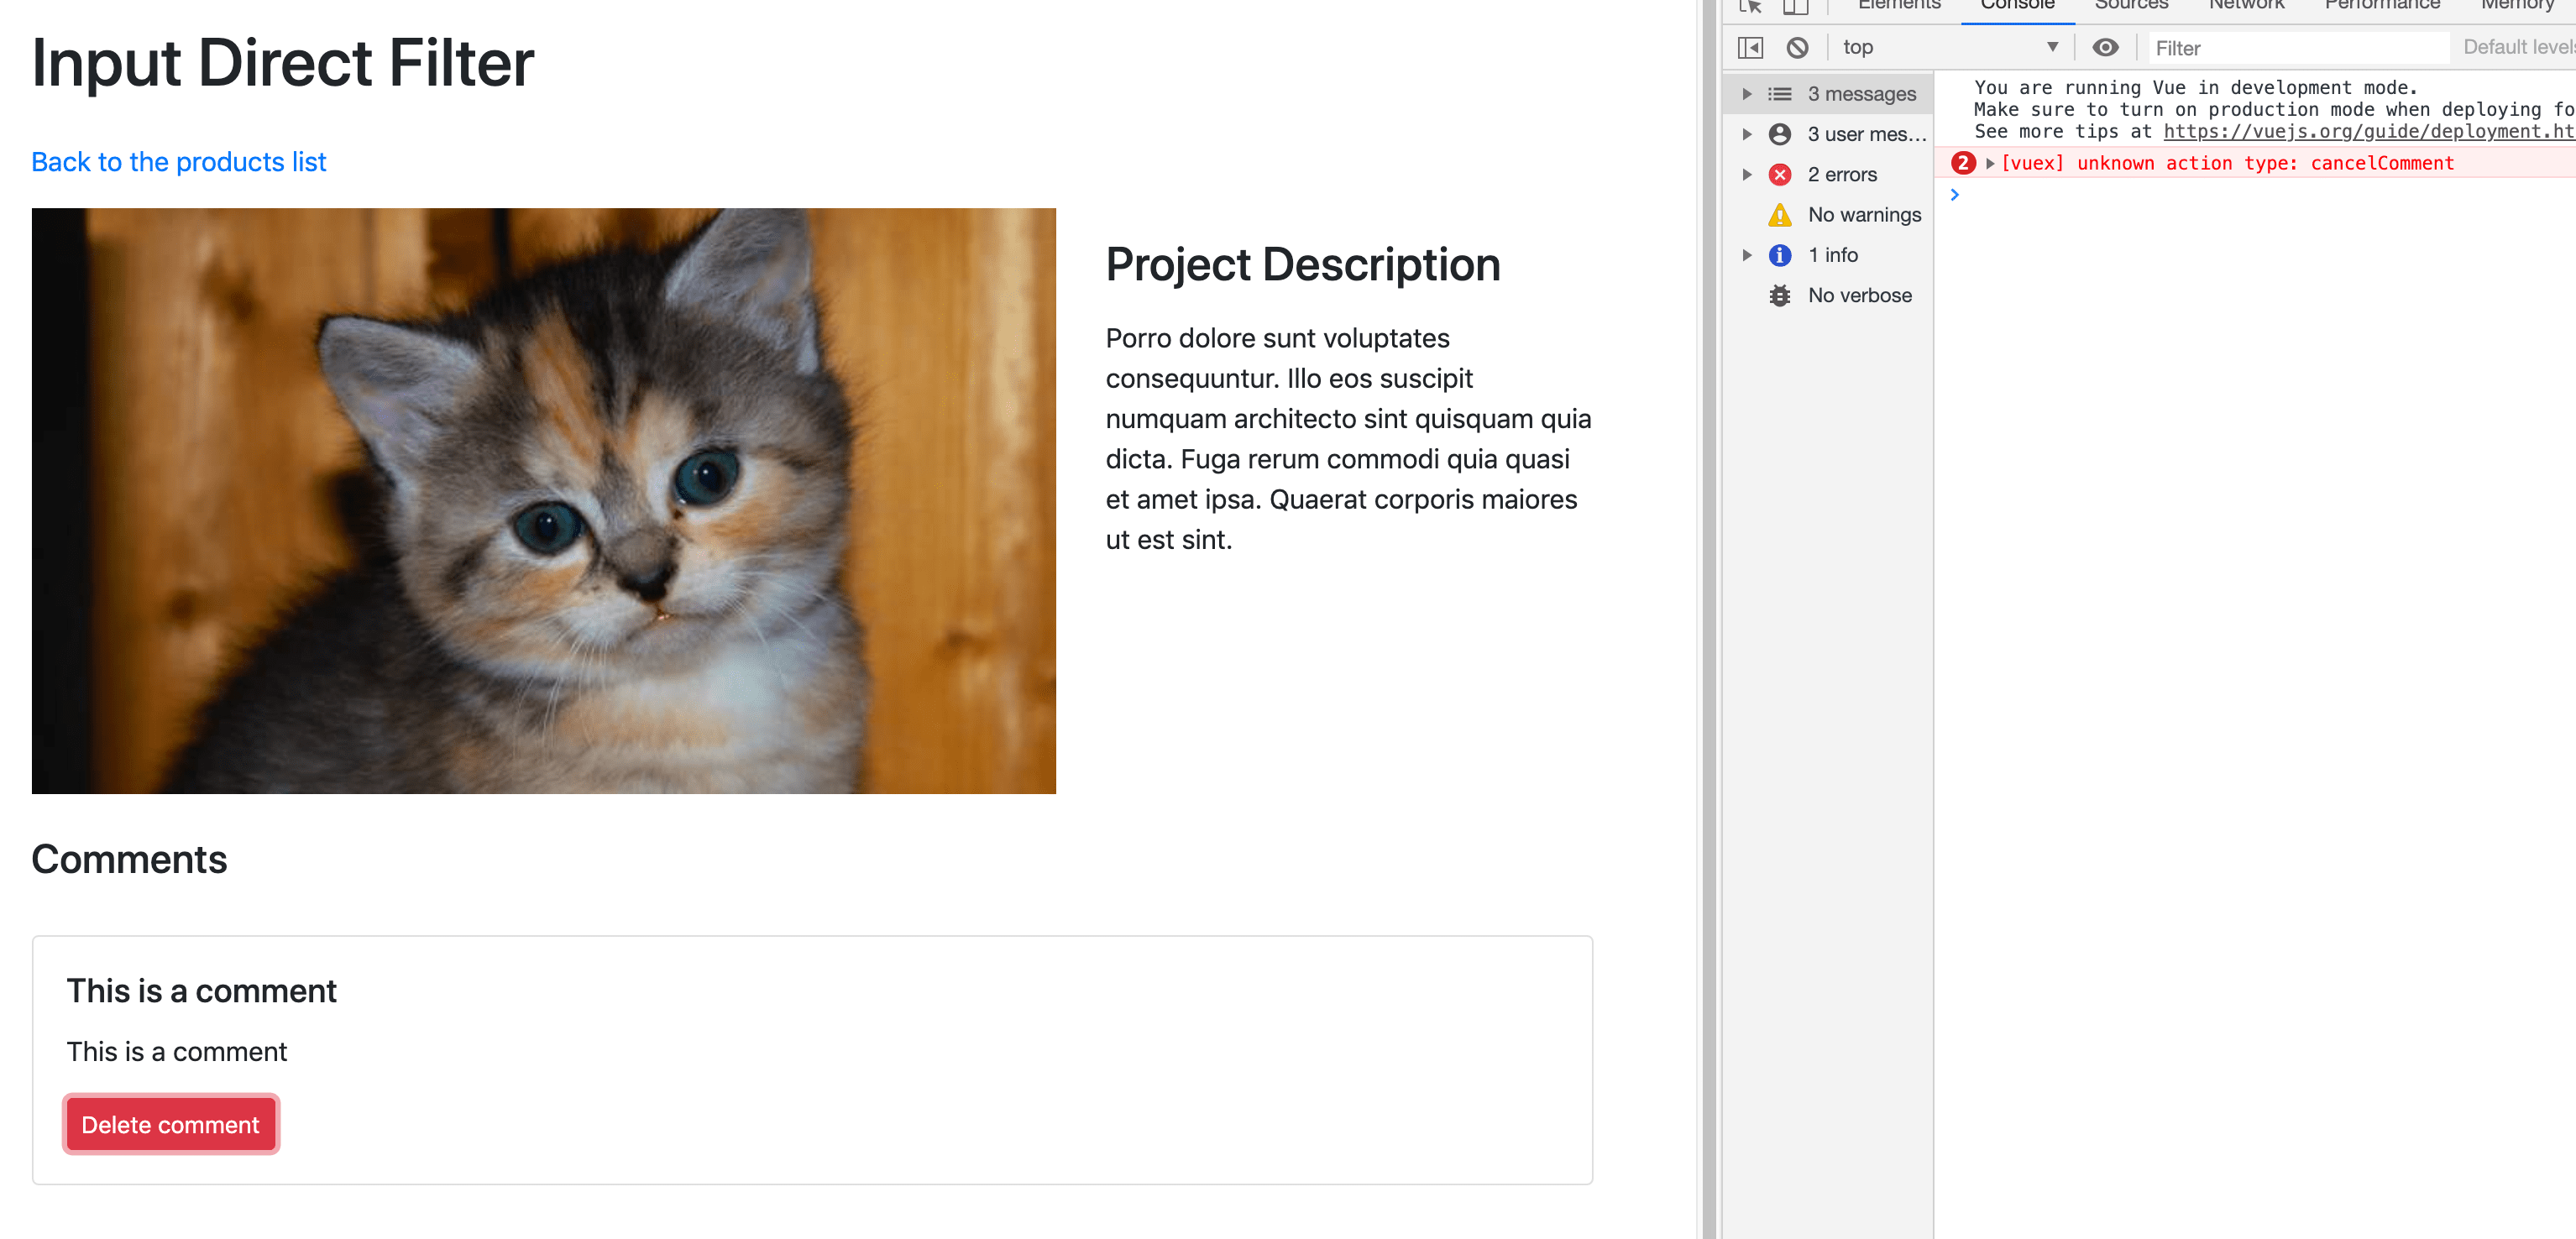
At this point, you should see the page like before with the comment list. However, the delete comment button doesn't work. This happens because the action deleteComment wasn't implemented into the store.

Install Axios to make HTTP requests
To add or delete a comment without reloading the product page, we must implement the APIs and consume them using the Axios library.
$ yarn add axios
Implement the APIs to create and delete a comment
- Change the
config/routes.rbfile
Rails.application.routes.draw do
		root 'products#index'
		resources :products, only: %i[index show]
		namespace :api do
				resources :comments, only: :destroy
				resources :products, only: [] do
					resources :comments, only: :create
				end
		end
end
- Remove
app/controllers/comments_controller.rb - Create the API comments controller
app/controllers/api/comments_controller.rb - Implement the
createanddestroymethods
module Api
		class CommentsController < ApplicationController
				def create
					comment = Comment.new(comment_params)
					if comment.save
						render json: comment
					else
						render json: { errors: comment.errors }, status: :unprocessable_entity
					end
				end
				def destroy
					comment = Comment.find(params[:id])
					comment.destroy
				end
				private
				def comment_params
					params
						.require(:comment)
						.permit(:title, :description)
						.merge(product_id: params[:product_id])
				end
		end
end
Delete the comments
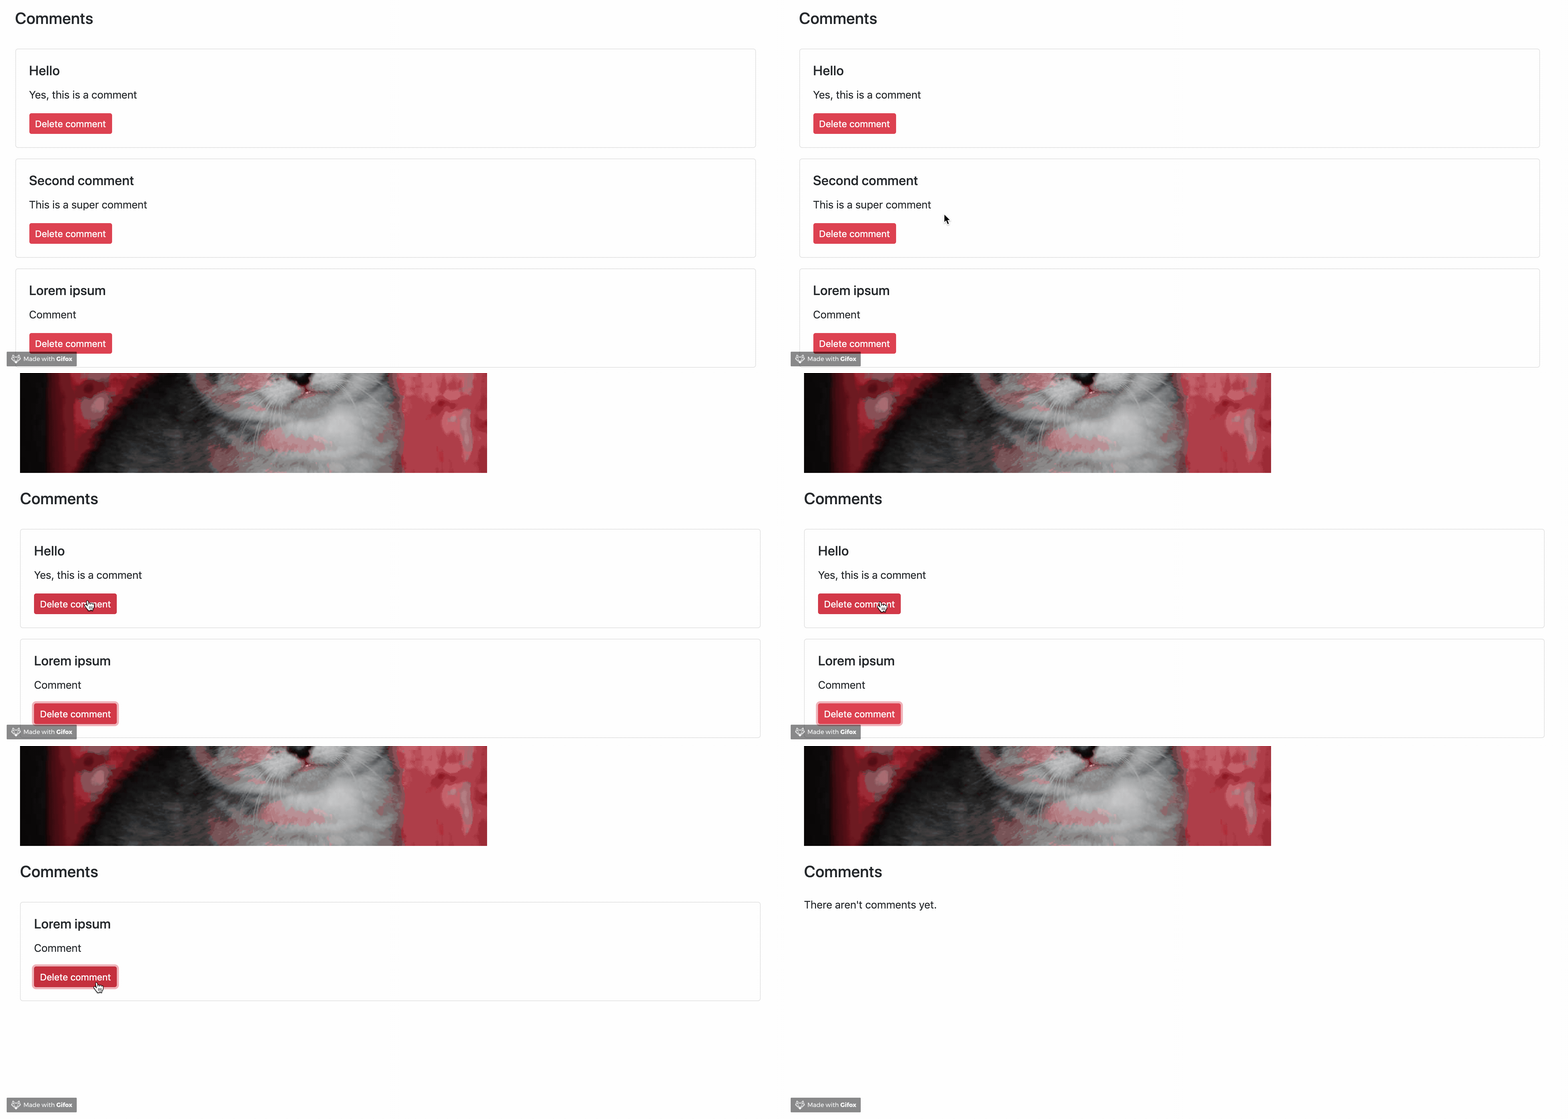
To recap, we added a button to delete a comment to the comment card component.
When the user clicks on the delete button, the component should dispatch the correct action, e.g. deleteComment.
The action calls the correct API method (which doesn't exist yet) and it will commit the correct mutation based on the response.
If the destroy API call was successful, remove the deleted comment from the comments array.
If the destroy API call was unsuccessful, fill the errors array to show the errors.
Implement the API client with Axios
- Create the Axios instance
app/javascript/api/instance.js
import axios from 'axios'
axios.defaults.headers.common['X-CSRF-Token'] = document.querySelector('meta[name="csrf-token"]').getAttribute('content')
export default axios.create()
- Add the index file
app/javascript/api/index.jswhich exports all the API modules. In this case, we use Axios only to manage the comments.
import comment from './comment'
export default {
		comment
}
- Implement the methods that will make the HTTP request:
app/javascript/api/comment.js
import api from './instance'
/**
* Create a comment
*/
const create = (productId, commentParams) => (
		api.post(Routes.api_product_comments_path(productId), commentParams)
		.then(response => response.data)
)
/**
* Destroy a comment
*/
const destroy = (commentId) => (
		api.delete(Routes.api_comment_path(commentId))
		.then(response => response.data)
)
export default {
		create,
		destroy
}
Install and configure js-routes gem
This gem is needed to share Rails routes with JavaScript.
- Add the gem to the Gemfile and run
bundle install:
gem 'js-routes'
- Require the gem in
app/assets/javascripts/application.js:
//= require js-routes
- Configure js-routes specifying which routes should be shared by creating the configuration file:
config/initializers/js_routes.rb
# frozen_string_literal: true
JsRoutes.setup do |config|
		config.include = [
				/^api_comment$/,
				/^api_product_comments$/,
		]
end
- Run this commands and restart the Rails server:
$ bundle exec rails tmp:cache:clear
Implement the action and the mutations
- Import the API module in the product store
app/javascript/store/modules/product.js
import api from '../../api'
- Add the method to the actions object:
cancelComment({ commit }, commentId) {
		api.comment.destroy(commentId)
			.then(() => {
				commit('commentCancelled', commentId)
			})
	}
- Add the method
commentCancelledto the mutation object:
commentCancelled(state, commentId) {
		state.comments = state.comments.filter(comment => commentId !== comment.id)
},
The commentCancelled method will filter the comments array removing the canceled comment.
At this point, the delete comment feature should work.

Add a comment
Since we removed the comment form partial from the product show view, the form disappeared from the page. To fix this, we will create the commentForm Vue component.
- Create the component:
app/javascript/components/comment/form.js
import { mapActions } from 'vuex'
export default {
		props: {
				product: Object
		},
		data() {
				return {
					title: '',
					description: ''
				}
		},
		methods: {
				...mapActions({
					addComment: 'addComment'
				}),
				submitComment() {
					this.addComment({
						productId: this.product.id,
						commentParams: {
							title: this.title,
							description: this.description
						}
					})
					this.title = ''
					this.description = ''
				}
		},
		render() {
				return(
					<div class="row my-2">
						<div class="col-md-8">
							<h4 class="my-4">Add new comment</h4>
							<div class="form-label-group">
								<input type="input" class="form-control" name="title"
									placeholder={I18n.t('comments.form.title')}
									autofocus="true" vModel_trim={this.title} />
							</div>
							<div class="form-label-group my-3">
								<input type="input" class="form-control" name="description"
									placeholder={I18n.t('comments.form.description')}
									vModel_trim={this.description} />
							</div>
							<input type="submit" class="btn btn-primary" value={I18n.t('comments.form.submit')}
								vOn:click_stop_prevent={this.submitComment} />
						</div>
					</div>
				)
		}
}
- Add the component to the instances file:
app/javascript/instances.js
// Import components
import ProductList from './components/product/index'
import CommentList from './components/comment/index'
import CommentForm from './components/comment/form'
export const ProductListInstance = {
		el: '.vue-products',
		component: ProductList
}
export const CommentListInstance = {
		el: '.vue-comments',
		component: CommentList
}
export const CommentFormInstance = {
		el: '.vue-comment-form',
		component: CommentForm
}
- Add the commentForm wrapper at the end of the product show:
app/views/products/show.html.erb
<div class="vue-comment-form" data-props="<%= props %>">
</div>
Now, the comment form appears at the end of the product detail page again, but it doesn't work.
- Add the
addCommentaction that calls the create method of the APIs inapp/javascript/store/modules/product.js
addComment({ commit }, { productId, commentParams }) {
		api.comment.create(productId, commentParams)
			.then((comment) => {
				commit('commentAdded', comment)
			})
}
- Add the
commentAddedmutation which updates the comments array inapp/javascript/store/modules/product.js
commentAdded(state, comment) {
		state.comments.push(comment)
}

Finally we're done
Now your application uses both Rails and VueJS to render views and components. To learn how to manage errors with the comment form, you can use the repository linked above.
Over the next months, more articles will come out describing other ways to integrate Ruby on Rails and VueJS.


