Introduction
In this tutorial, we will learn how to test Ruby on Rails applications with Minitest. We’ll cover how to do use Minitest’s mocks and stubs to improve the performance of your tests.
Once we understand how testing works, we’ll set up a Continuous Integration (CI) pipeline with Semaphore to speed up development.
Prerequisites
To follow this tutorial, you’ll need Ruby installed along with Rails. This tutorial was tested using Ruby version 2.7, Rails version 6.0, and Minitest version 5.14.
To get started you can use gem install rails, and you should be good to go, provided you have Ruby installed:
$ gem install railsWhat is Minitest?
Minitest is a complete testing suite for Ruby, supporting test-driven development (TDD), behavior-driven development (BDD), mocking, and benchmarking. It’s small, fast, and it aims to make tests clean and readable.
If you’re new to Minitest, then you can take a look at our tutorial on getting started with Minitest.
Minitest is bundled with the Rails installation, so no further set up is required to get it to work. Minitest and RSpec are the two most common testing suites used in Ruby. If you’d like to learn more about RSpec, you can read our tutorials:
- How to Test Rails Models with RSpec
- Getting started with RSpec
- Mocking with RSpec: doubles and expectations.
Test Doubles and Terminology
The terminology surrounding mocks and stubs can be a bit confusing. The main terms you might come across are stubs, mocks, doubles, dummies, fakes, and spies.
The umbrella term for all of these is double. A test double is an object used in testing to replace a real object used in production. We’ll cover dummies, stubs, and mocks in this tutorial because they are the ones used commonly in Minitest.
Dummies
The simplest of these terms is a dummy. It refers to a test double that is passed in a method call but never actually used. Much of the time, the purpose of these is to avoid ArgumentError in Ruby.
Minitest does not have a feature for dummies, because it isn’t really needed. You can pass in Object.new (or anything else) as a placeholder.
Stubs
Stubs are like dummies, except in that they provide canned answers to the methods which are called on them. They return hardcoded information in order to reduce test dependencies and avoid time-consuming operations.
Mocks
Mocks are “smart” stubs, their purpose is to verify that some method was called. They are created with some expectations (expected method calls) and can then be verified to ensure those methods were called.
Mocks and Stubs
The easiest way to understand mocks and stubs is by example. Let’s set up a Rails project and add some code that we can use mocks and stubs to test.
For this example, we’ll create user and subscription models with a subscription service that can be used to create or extend subscriptions.
Assuming you have Ruby and Ruby on Rails set up, we can start by creating our Rails application.
$ rails new --skip-bundle mocking-in-ruby-with-minitest
$ bundle config set path 'vendor/bundle'
$ bundle install
Now, let’s add our user model and tests by using the Rails generator:
$ rails g model user name:string

      invoke  active_record
      create    db/migrate/20200403151713_create_users.rb
      create    app/models/user.rb
      invoke    test_unit
      create      test/models/user_test.rb
      create      test/fixtures/users.yml
Next, let’s create the model for subscriptions which has a reference to the user model:
$ rails g model subscription expires_at:date user:references

      invoke  active_record
      create    db/migrate/20200403151747_create_subscriptions.rb
      create    app/models/subscription.rb
      invoke    test_unit
      create      test/models/subscription_test.rb
      create      test/fixtures/subscriptions.yml
Then, migrate the database:
$ rake db:migrateFinally, let’s create a service that creates and manages subscriptions. Start by adding a reference from User to Subscription in app/models/user.rb.
class User < ApplicationRecord
  has_one :subscription
end
Now, let’s add our subscription service tests. To keep things simple, we don’t test that the expires_at attribute is always correct. Create the test file test/services/subscription_service_test.rb:
# test/services/subscription_service_test.rb

require 'test_helper'

class SubscriptionServiceTest < ActiveSupport::TestCase
  test '#create_or_extend new subscription' do
    user = users :no_sub
    subscription_service = SubscriptionService.new user
    assert_difference 'Subscription.count' do
      assert subscription_service.apply
    end
  end

  test '#create_or_extend existing subscription' do
    user = users :one
    subscription_service = SubscriptionService.new user
    assert_no_difference 'Subscription.count' do
      assert subscription_service.apply
    end
  end
end
Let’s also add a user fixture for the user which has no subscriptions. Add the following two lines to the user fixture file test/fixtures/user.yml:
no_sub:
  name: No Subscription
Now, let’s make our test pass by adding SubscriptionService. Note that app/services and test/services do not exist by default so you will have to create them.
# app/services/subscription_service.rb

class SubscriptionService
  SUBSCRIPTION_LENGTH = 1.month

  def initialize(user)
    @user = user
  end

  def apply
    if Subscription.exists?(user_id: @user.id)
      extend_subscription
    else
      create_subscription
    end
  end

  private

  def create_subscription
    subscription = Subscription.new(
      user: @user,
      expires_at: SUBSCRIPTION_LENGTH.from_now
    )

    subscription.save
  end

  def extend_subscription
    subscription = Subscription.find_by user_id: @user.id

    subscription.expires_at = subscription.expires_at + SUBSCRIPTION_LENGTH
    subscription.save
  end
end
Now, run the tests to make sure everything is passing:
$ rake

# Running:

..

Finished in 0.136840s, 14.6156 runs/s, 29.2311 assertions/s.
2 runs, 4 assertions, 0 failures, 0 errors, 0 skips
Great! We’re now ready to add some functionality, which we can benefit from by using mocks and stubs in the tests.
Stubbing
Stubbing is useful when we want to replace a dependency method which takes a long time to run with another method that has the return value we expect.
However, it’s usually not a good idea to do this if the method belongs to the class you are testing, because then you’re replacing the method you should be testing with a stub. It’s fine to do this for methods of other classes that have their own tests already but are called from the class we are testing.
Let’s add a method to User called #apply_subscription. This method will call SubscriptionService to apply the subscription. In this case, we have already tested the subscription service, so we don’t need to do that again. Instead, we can just make sure it is called with a combination of stubbing and mocking.
In order to create mocks, we also need to load Minitest in test_helper.rb. Add this require call to the ones in test/test_helper.rb:
require 'minitest/autorun'Now, let’s add tests where we use a mock to mock SubscriptionService and stub #apply to just return true without ever calling the real SubscriptionService.
# test/models/user_test.rb

require 'test_helper'

class UserTest < ActiveSupport::TestCase
  test '#apply_subscription' do
    mock = Minitest::Mock.new
    def mock.apply; true; end

    SubscriptionService.stub :new, mock do
      user = users(:one)
      assert user.apply_subscription
    end
  end
end
Since we have already tested SubscriptionService, we don’t need to do it again. That way, we don’t have to worry about the setup and the overhead of accessing the database, which makes our test faster and simpler.
Now, let’s add the code to make the test pass. Add the apply_subscription method in app/models/user.rb:
# app/models/user.rb

class User < ApplicationRecord
  has_one :subscription

  def apply_subscription
    SubscriptionService.new(self).apply
  end
end
Although we have demonstrated how stubbing works here, we are not really testing anything, to do that we need to make full use of mocks.
Mocking
One of the core functionalities of mocks is to be able to verify that we called a method that we stubbed. Sometimes this isn’t something we want to, however, a lot of the time, we want to make sure we called some method, but we don’t care to test if it works or not, because it’s already been tested.
Let’s change our test to verify that SubscriptionService#apply was called, even though it calls our stub instead of the real thing. Edit test/models/user_test.rb:
# test/models/user_test.rb

require 'test_helper'

class UserTest < ActiveSupport::TestCase
  test '#apply_subscription' do
    mock = Minitest::Mock.new
    mock.expect :apply, true

    SubscriptionService.stub :new, mock do
      user = users(:one)
      assert user.apply_subscription
    end

    assert_mock mock
  end
end
Note how we tell our mock what method call we are expecting along with the return value. It’s possible to pass in a third argument, which is an array of arguments that the method is expected to receive. If the method has any arguments passed to it, this needs to be included in the method call.
Let’s try the tests one last time:
$ rake

# Running:

...

Finished in 0.175187s, 17.1246 runs/s, 34.2491 assertions/s.
3 runs, 6 assertions, 0 failures, 0 errors, 0 skips
Stubbing Constants
Sometimes we want to be able to change the return value of calling a constant in a class from a test. If you’re coming from RSpec, you might be used to having this feature in your toolbelt. However, Minitest doesn’t ship with such a feature.
There’s a gem that provides this functionality for Minitest called minitest-stub-const.
It can be quite useful when you want to change the value of a constant in your class, e.g when you need to test some numerical limits. One common use results per page in pagination. If you have 25 results per page set in a constant, it can be easier to stub that constant to return 2, reducing the setup required to test your pagination.
Overusing Mocks or Stubs
It’s possible to overuse mocks or stubs, and it’s important to be careful and avoid doing that. For example, if we stubbed the test for SubscriptionService in order to just return some data instead of opening a real file and performing the search on it, we wouldn’t actually know if SubscriptionService works.
This is a rather obvious case. However, there are more subtle scenarios where mocks and stubs should be avoided.
Continuous Integration
Continuous Integration (CI) is a software development practice that helps developers ensure their code is properly tested. Once we set up a CI pipeline, it will run the tests for us on each modification and notify us as soon as an error is introduced. CI gives developers the chance to work with small iterations and merge more frequently.
We can setup CI for free in just a few minutes:
- Go to GitHub and sign up or log in.
- Create an empty new repository for the project:

- Copy the repository URL:
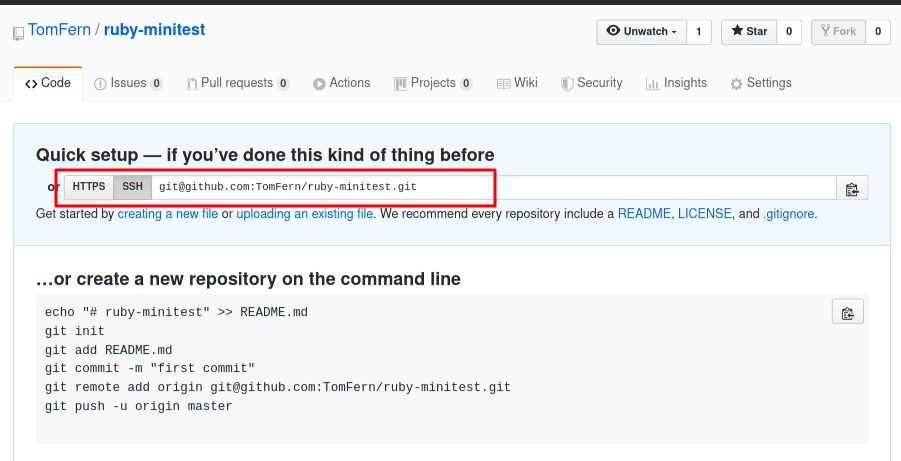
- Ignore
vendorandtmpdirectories with.gitignore:
$ echo "vendor/" >> .gitinore
$ echo "tmp/" >> .gitinore- Push your project to GitHub with your repository address:
$ git remote add origin git@github.com:TomFern/ruby-minitest.git
$ git add -A
$ git commit -m "initial commit"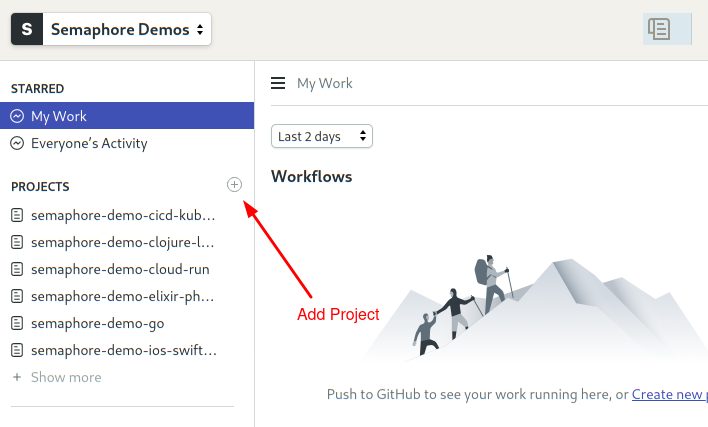
$ git push origin master- Go to Semaphore and sign up using the Sign up with GitHub button.
- On the left navigation menu, click on the + (plus sign) next to Projects:
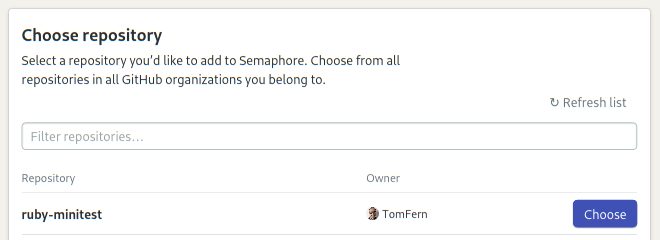
- Find your GitHub repository and click on Choose:
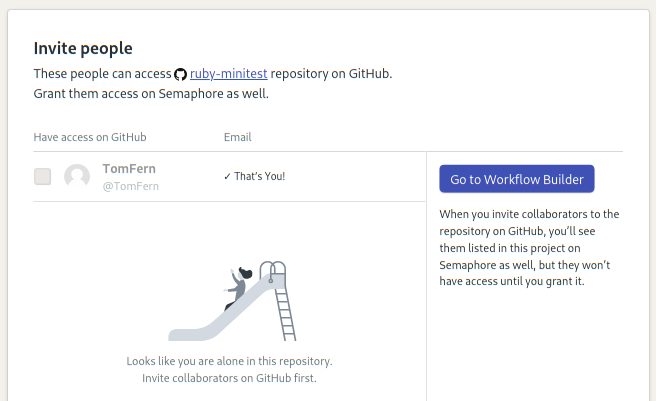
- Click on Go to Workflow Builder:
- Select the Ruby on Rails workflow and click on Customize it First:
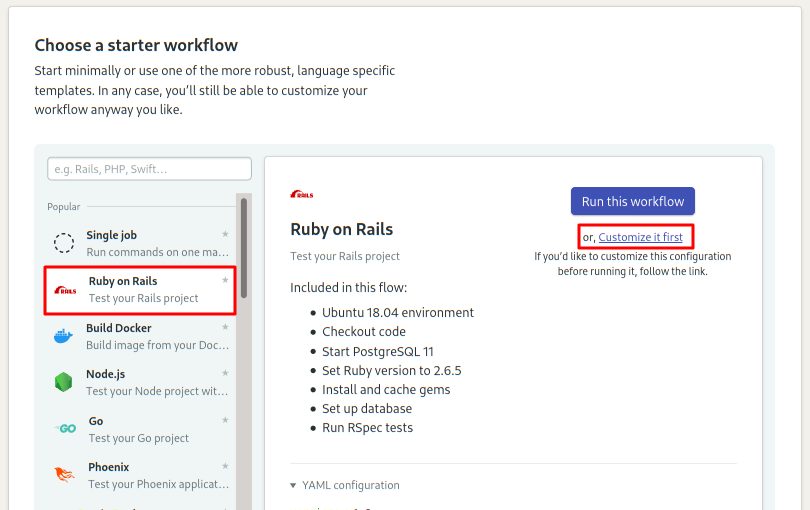
The started workflow is has a single block with a job that:
- Installs the Ruby Gems.
- Migrates the database.
- Runs the tests.
We’ll have to make a couple of modifications. For one thing, the starter workflow uses a PostgreSQL database that we don’t need, so we’re going to remove it. Second, we’re are not using RSpec to tests; the test command is rake:
- On the right side, open the Environment Variables section and delete the
DATABASE_URLvariable altogether. - Replace all commands in the job with these:
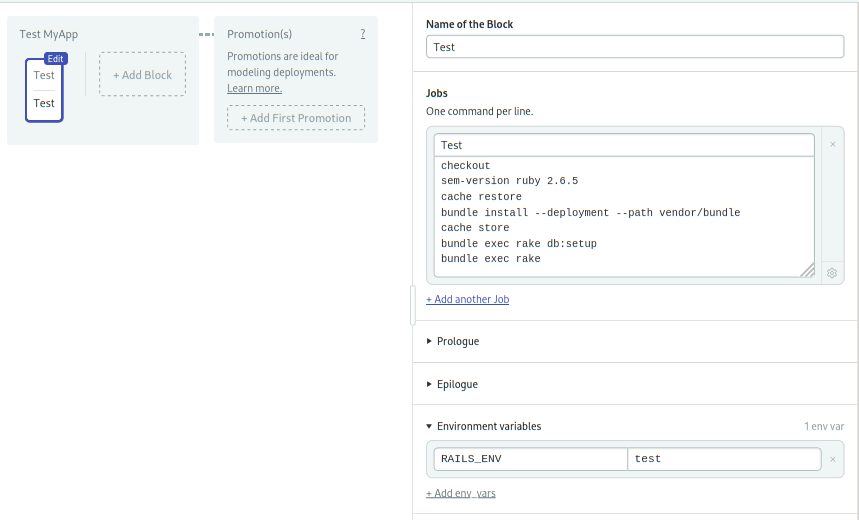
checkout
sem-version ruby 2.6.5
cache restore
bundle install --deployment --path vendor/bundle
cache store
bundle exec rake db:setup
bundle exec rake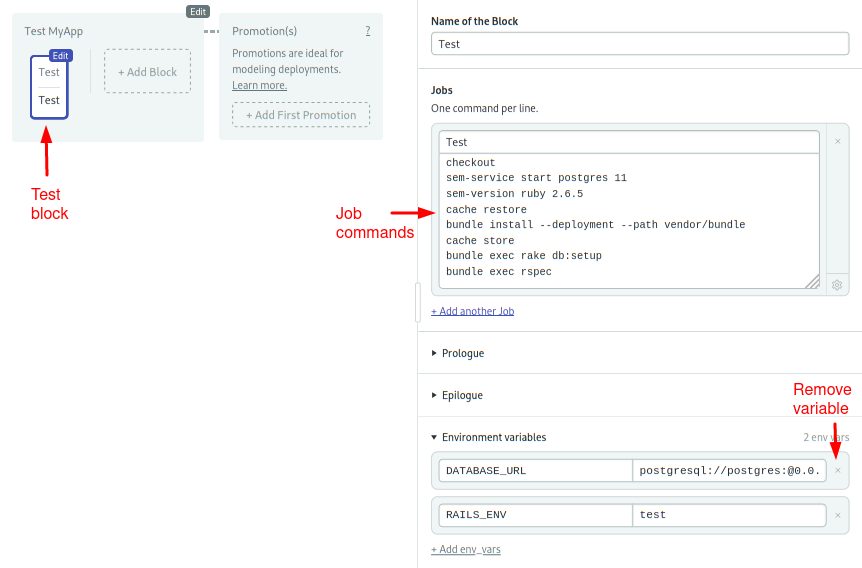
- This is how the job should look like after you make the changes:
- Click on Run the Workflow and then Start:
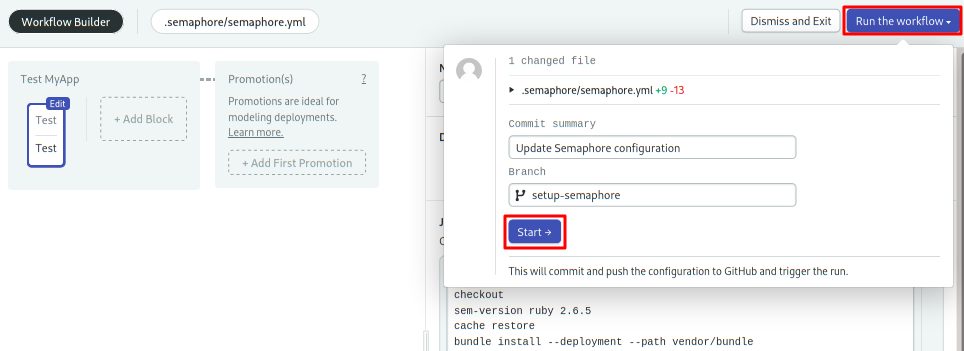
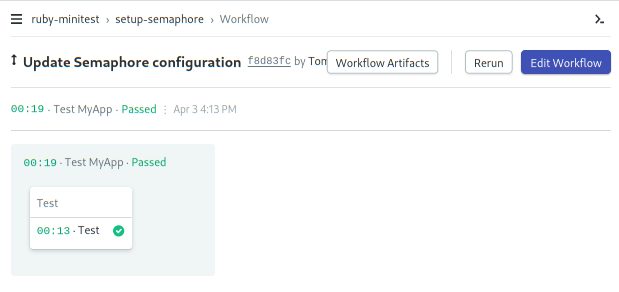
After a few seconds the job should have tested the code:
That’s it! Now Semaphore will re-test the project each time your GitHub repository is modified.
How does the pipeline work? You may have noticed that we used some special commands in the job, these were scripts bundled with the built-in Semaphore toolbox:
- checkout: the checkout commands clones the correct revision of the GitHub repository and changes the directory. It’s usually the first command in a job.
- sem-version: with sem-version, we can switch the active version of a language. Semaphore fully supports many languages, including Ruby.
- cache: the cache is your project file storage. Cache smart enough to figure out which files have to be stored and retrieved.
Learn More About Ruby on Semaphore
Congratulations on completing your first CI pipeline for Ruby! To continue learning about Ruby and Semaphore, be sure to check out these tutorials:
- Getting Started with RSpec
- How to Test Rails Models with RSpec
- Dockerizing a Ruby on Rails Application
Conclusion
In this tutorial, we have covered how to use mocks and stubs in Minitest. If you followed along, you should now have a Rails application with functioning tests that make use of mocks and stubs. You should now have an idea of the kinds of tasks for which it is beneficial to use mocks and stubs.
We’d also like to hear your comments and questions, so feel free to leave them in the section below.
P.S. Would you like to learn how to build sustainable Rails apps and ship more often? We’ve recently published an ebook covering just that — “Rails Testing Handbook”. Learn more and download a free copy.